
This project looks at ruggedising (the act of making something more rugged, resistant to shocks and resistant to liquids) an Android tablet so that it can be safely left with a toddler (3 years +). This gives you a fully functioning Android ruggedised/toddler-proof tablet for around €100 as opposed the specialised ones you can buy for that price and up and are usually limited in terms of the software and media you can put on it (also games and other software can be in the region of €30 for each application on top of the original hardware cost). This makes this hack both a cost saving and provides a more flexible software platform that can adapt to your child’s needs as they grow.
The main components are:
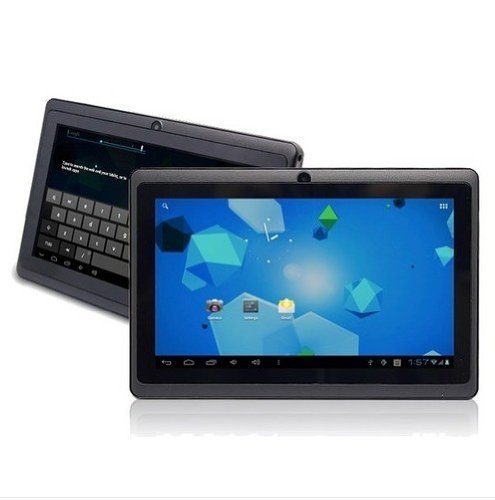
- Basic Android tablet (currently under €60) [search A13 or Yeahpad for alternative branding]
- Palm Pixi Plus Touchstone Back Battery Cover (currently under €10 on eBay)
- HP TouchStone Wireless Charging Dock (currently under €10 on Amazon.co.uk)
- Solder and soldering iron
- Plenty of Sugru
- USB micro connector (male)
- 3.5mm audio jack connector (male)
- Insulation tape/Duct Tape
- 2 paper clips
- some super-glue
- some small gauge wire
- a resizeable strap
- micro SD card (optional)
A13 or Yeahpad are alternative search terms for this tablet
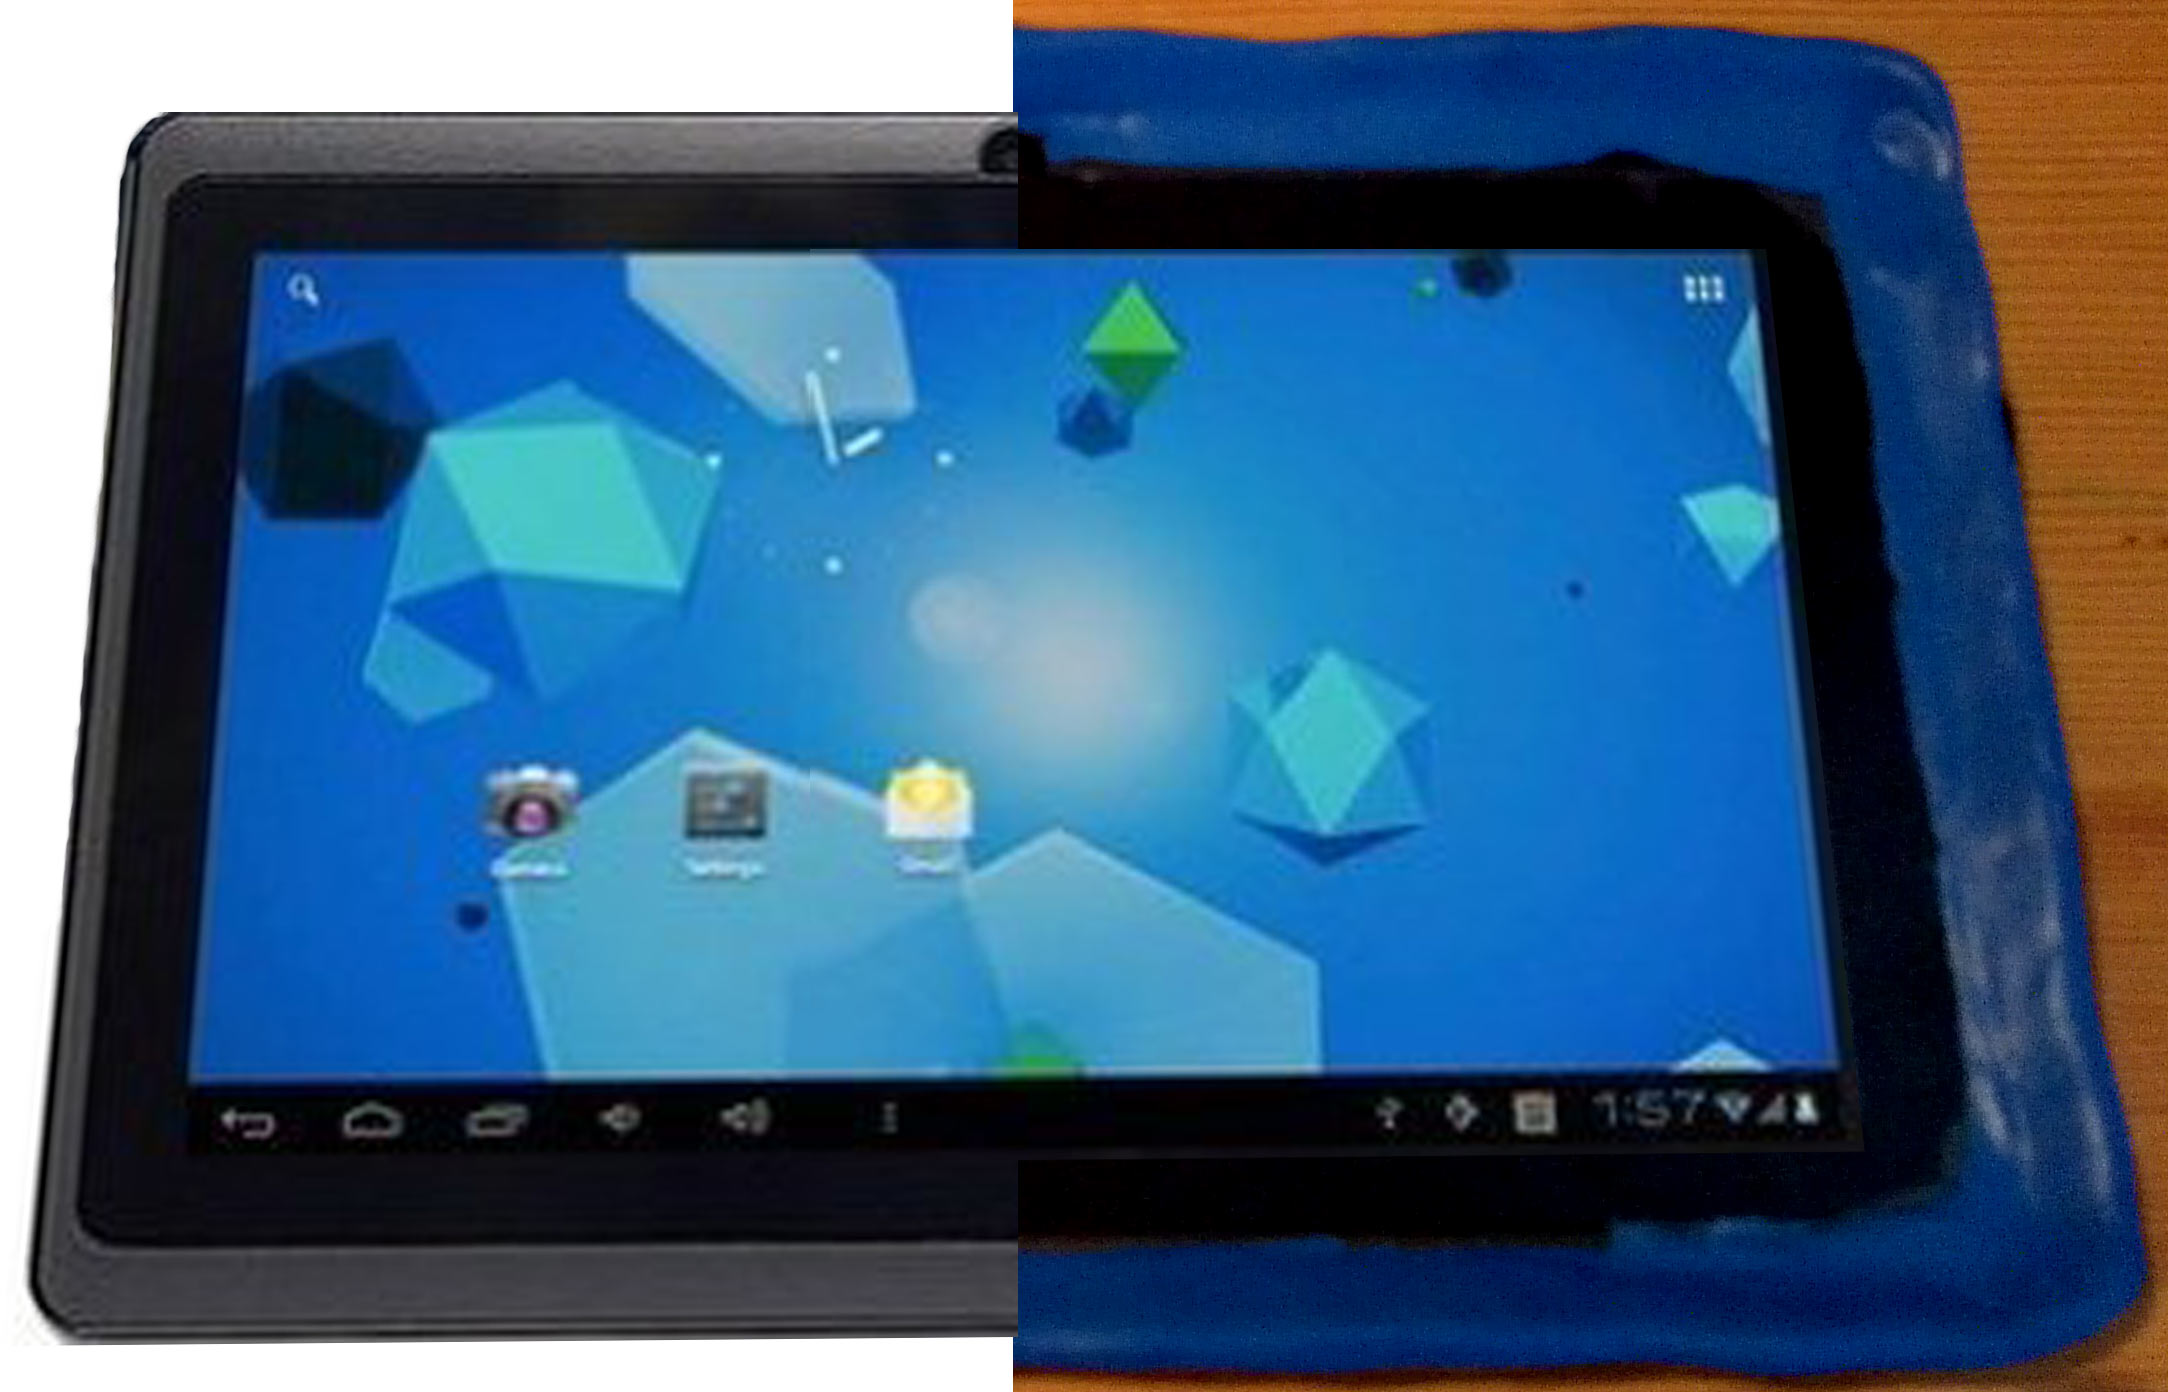
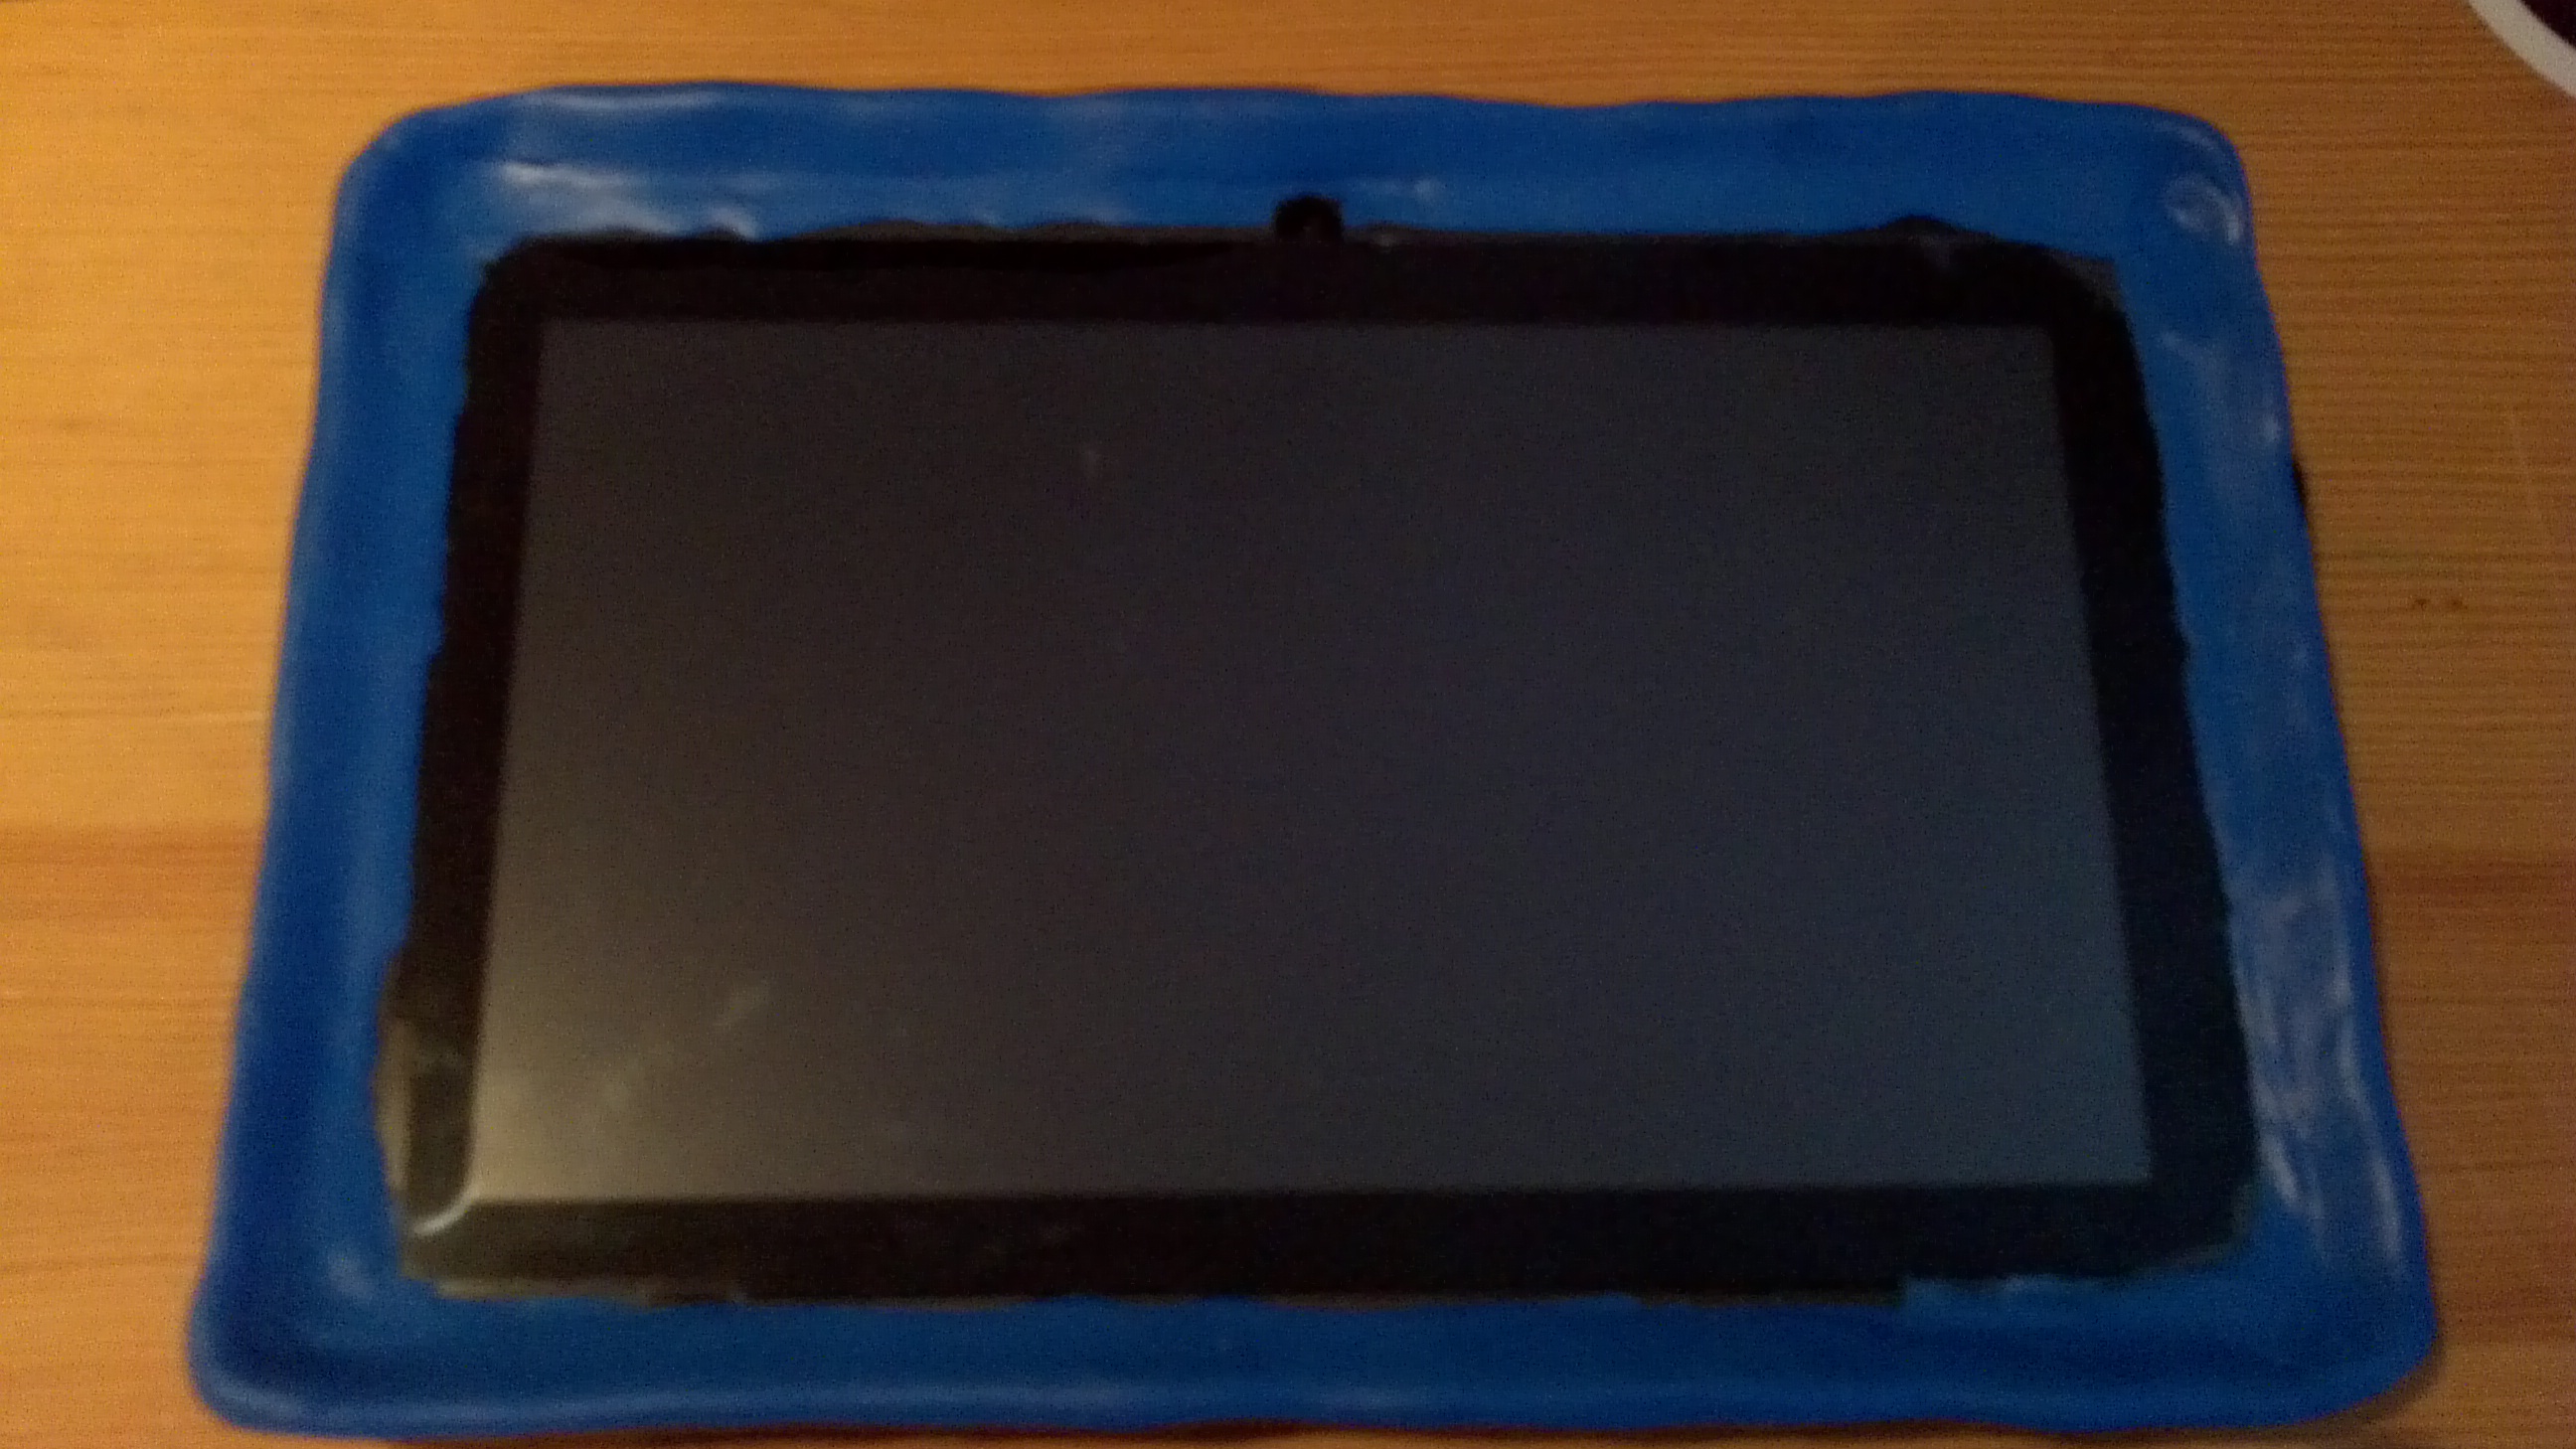
We start with a very basic Android tablet. The one linked to above is very basic, but I was surprised with it’s performance when the price is taken into consideration (I even bought another for myself).
The first aim was to make this tablet charge when placed on the HP Touchstone wireless charging dock, an approach that would make it first easier for the toddler to do themselves and secondly wouldn’t be vulnerable to split drink or other liquids that might get on the device (the tablet unlikely to survive being totally submerged). There are two parts to the wireless charging circuit the “Palm Pixi Plus Touchstone Back Battery” and the “HP TouchStone Wireless Charging Dock” both are pictured below.
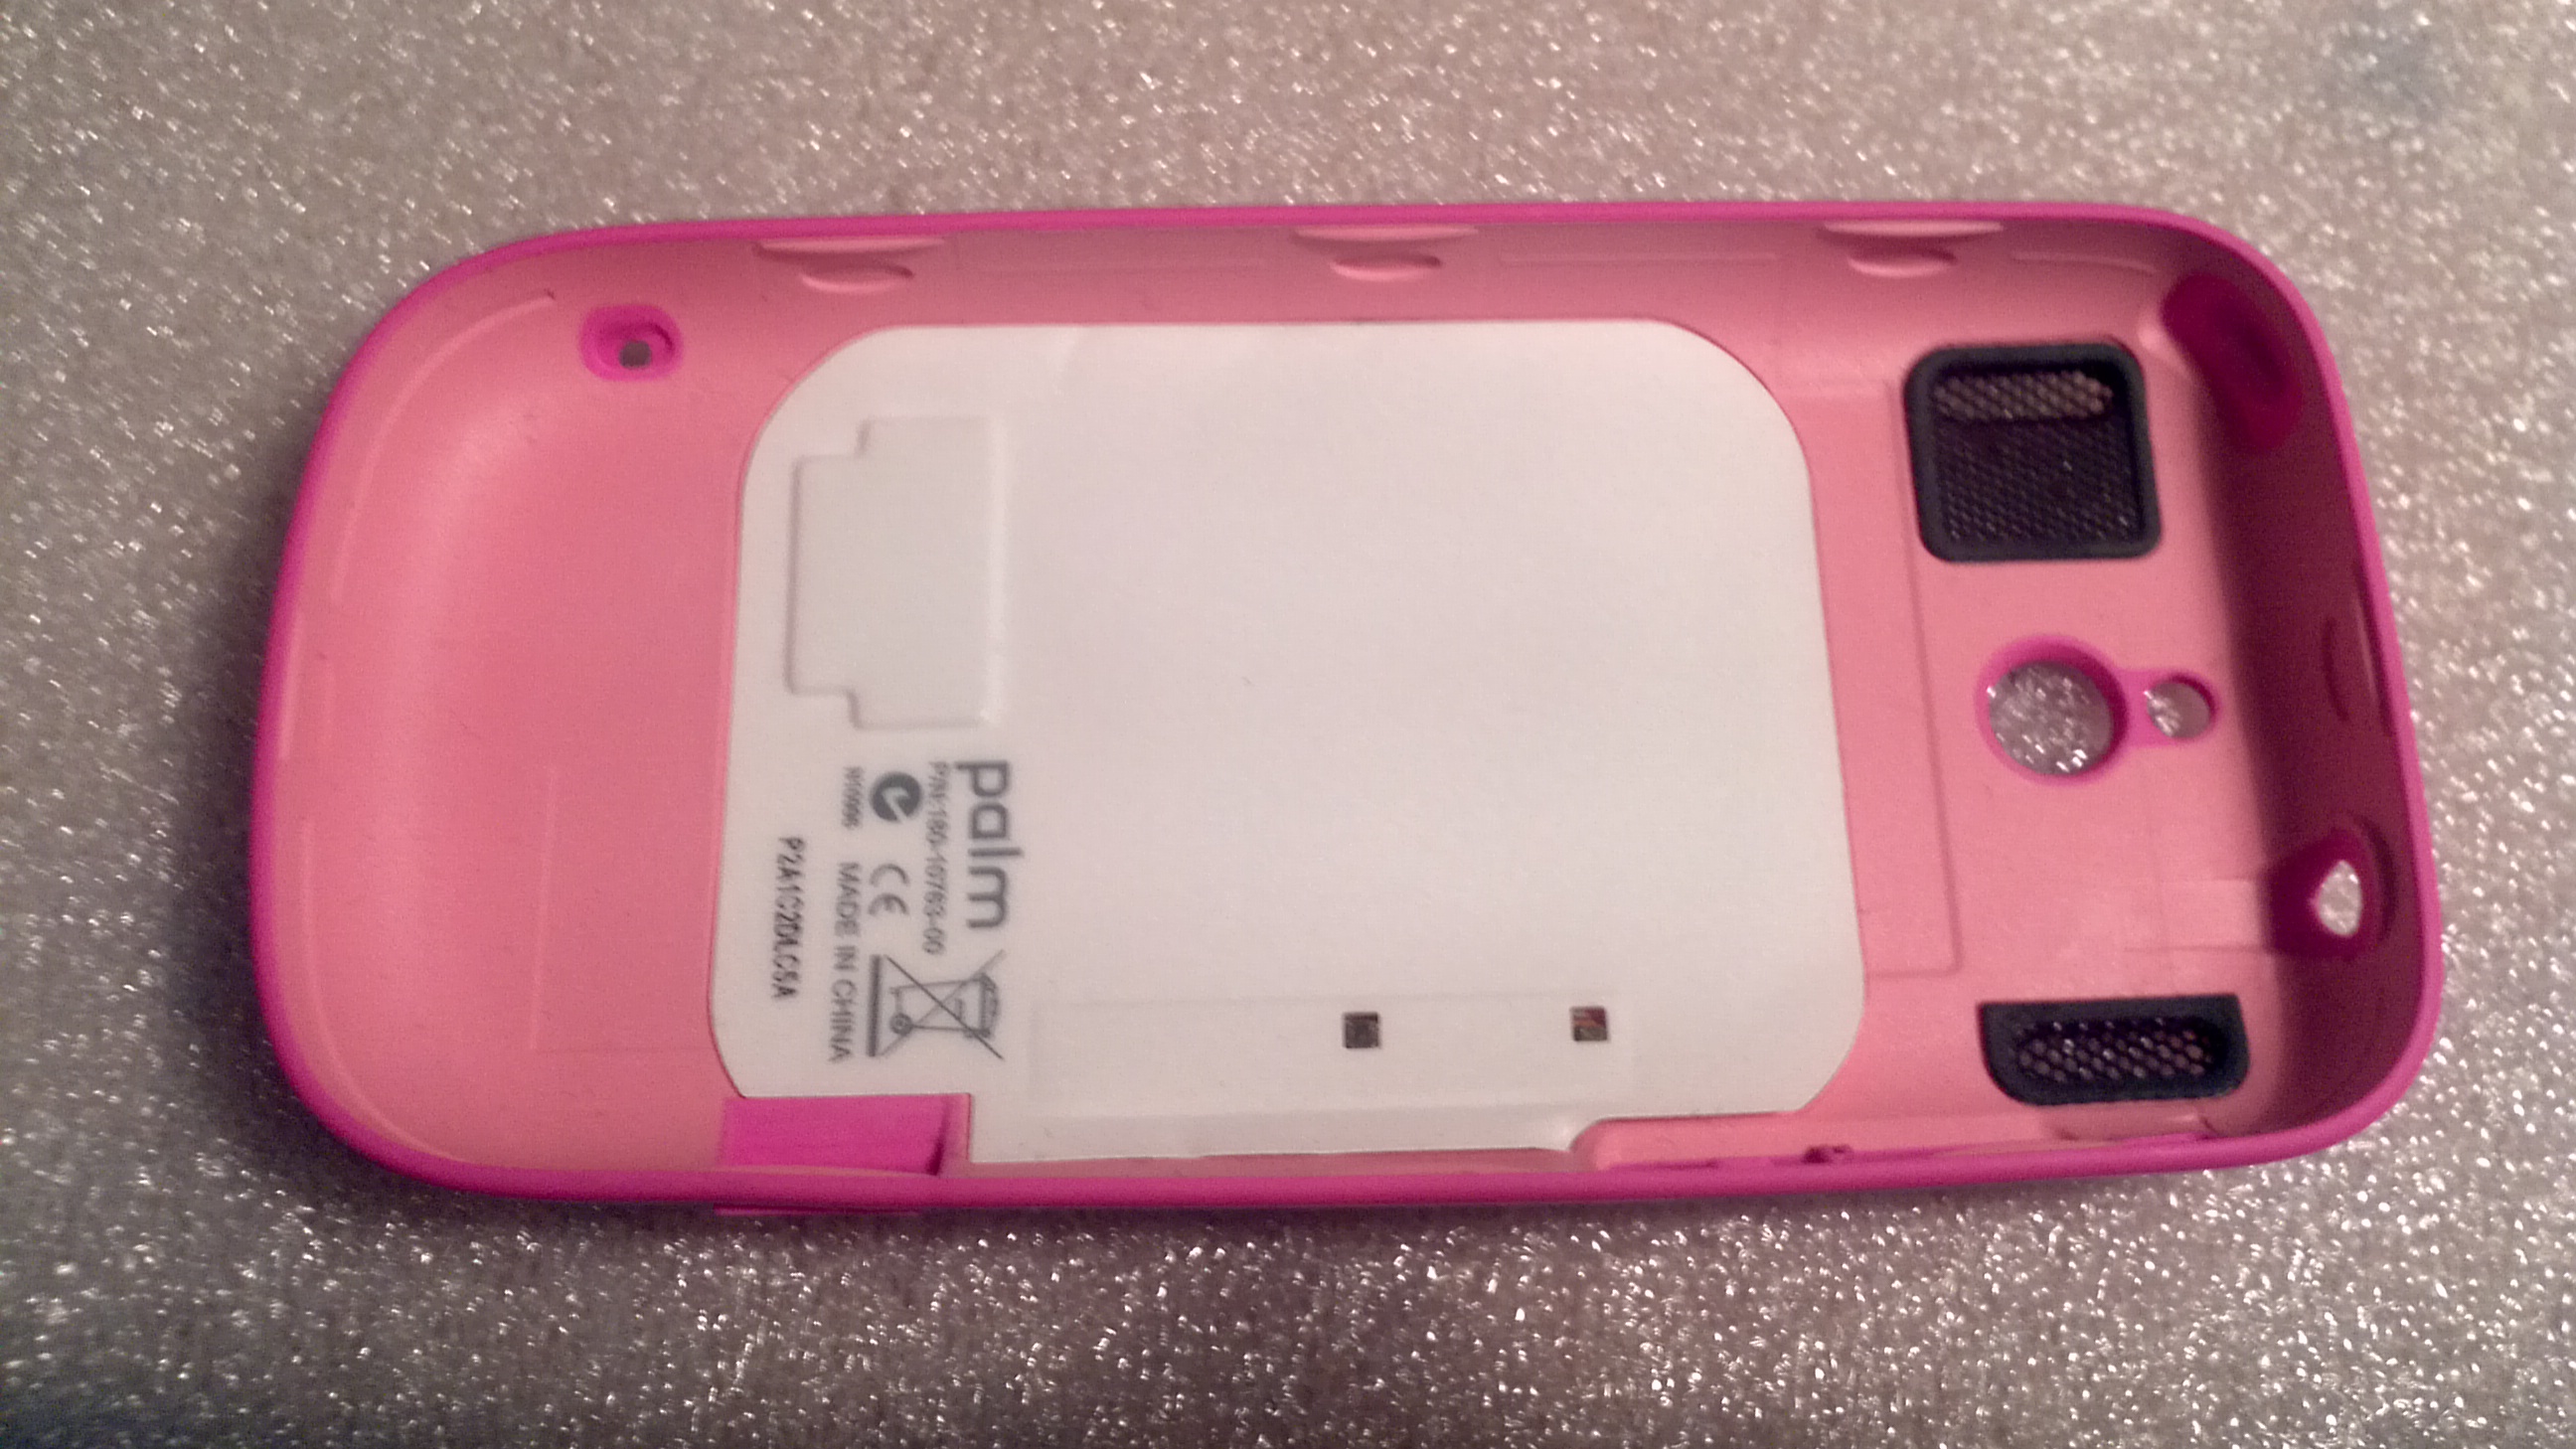
Palm Pixi Plus Touchstone Back Battery Cover Door inside

Palm Pixi Plus Touchstone Back Battery Cover Door with charging coil and metal position discs exposed
HP TouchStone Wireless Charging Dock
The middle photo above shows the internal charging coil and metal positioning discs (these help align and magnetically align the coil with the dock) from the inside of the Palm Pixi case. It is these components that we are going to transfer into the Android tablet in order to make it charge wirelessly. Remove these parts, being careful not to damage the charging coil (it is just lightly taped down, use a plectrum or similar to slip underneath and peel off). Don’t worry about damaging the case when removing the metal positioning disc as we are going to discard the case. Alternatively to using the metal discs you can replace them with similarly sized neodymium rare earth magnets, this will boost the magnetic attachment for a better holding force (but we are also adding Sugru that will also help hold the added weight of the tablet).
The tablet is easy enough to open up, just use a plectrum/fingernail or phone repair tools to work away the back panel of the tablet, be gentle enough it should easily come away. This tablet can be charged via two sources, the USB connection and a dedicated power jack. I decided to leave the USB exposed but would cover the power jack socket, so this would be where I would attach the wireless charging coil. Once inside remove the main circuit circuit board by first removing all the ribbon cables connectors (you will also need to free the tape holding them) and then the screws. Locate the power jack and insert the power cable that came with the tablet, now probe (with a voltmeter) the power jack connector on the main circuit board to establish the polarity (positive and negative terminals), make a note of the result. Now do the same with the charging coil, plug in the charging dock and place the coil on it (you may need to temporally stick the metal discs to it so that it stays in place), take the readings from the two metal pads visible in the first image of the Palm Pixi case (see above), again note the polarity. You are now ready to solder the corresponding polarities together (just remove the power cable first, just to be safe). Once this is complete line up the coil on the back panel of the tablet, being mindful of where the dock will be positioned on the far side, make sure the metal discs are oriented in the right position so that the dock aligns with the coil (you may want to secure the metal discs with a double sided tape and or use the original Pixi case for dimensions). The dock should stick to the back panel of the tablet. Add a little tape for strength when complete and you should have something like the picture below.
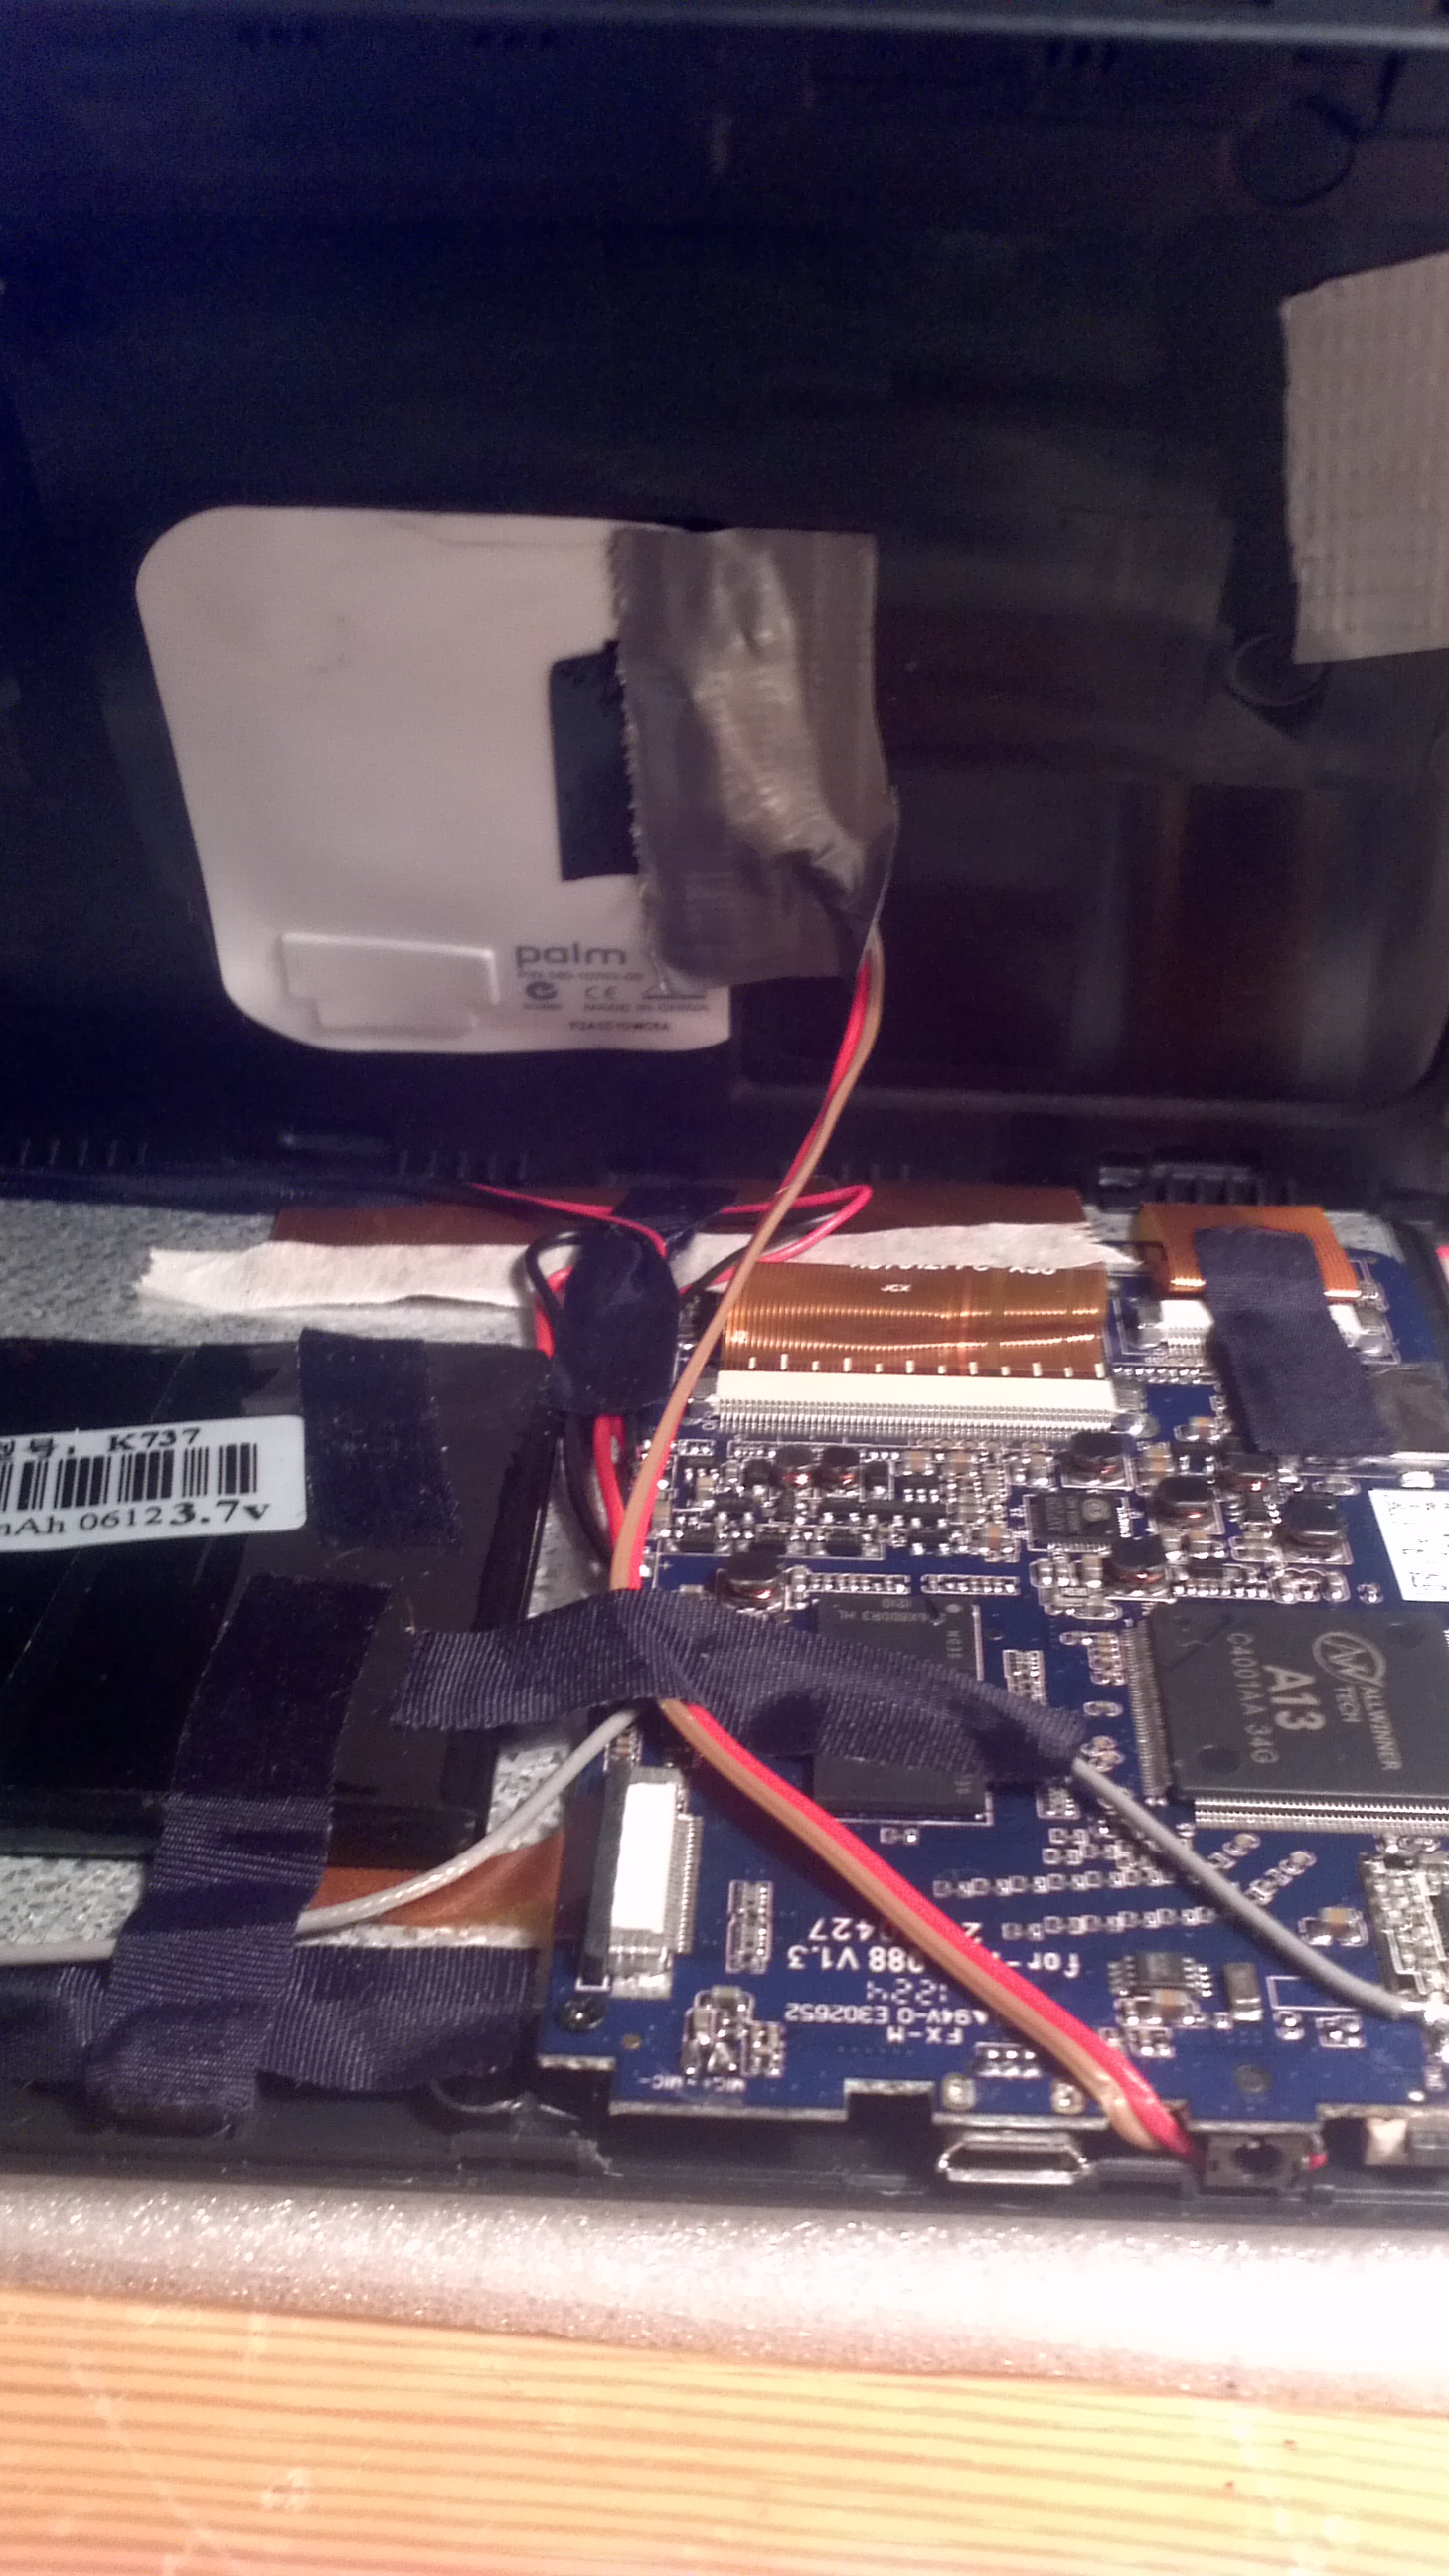
Wiring up the internal charging coil and positioning the coil
The tablet should now be charging wirelessly 🙂
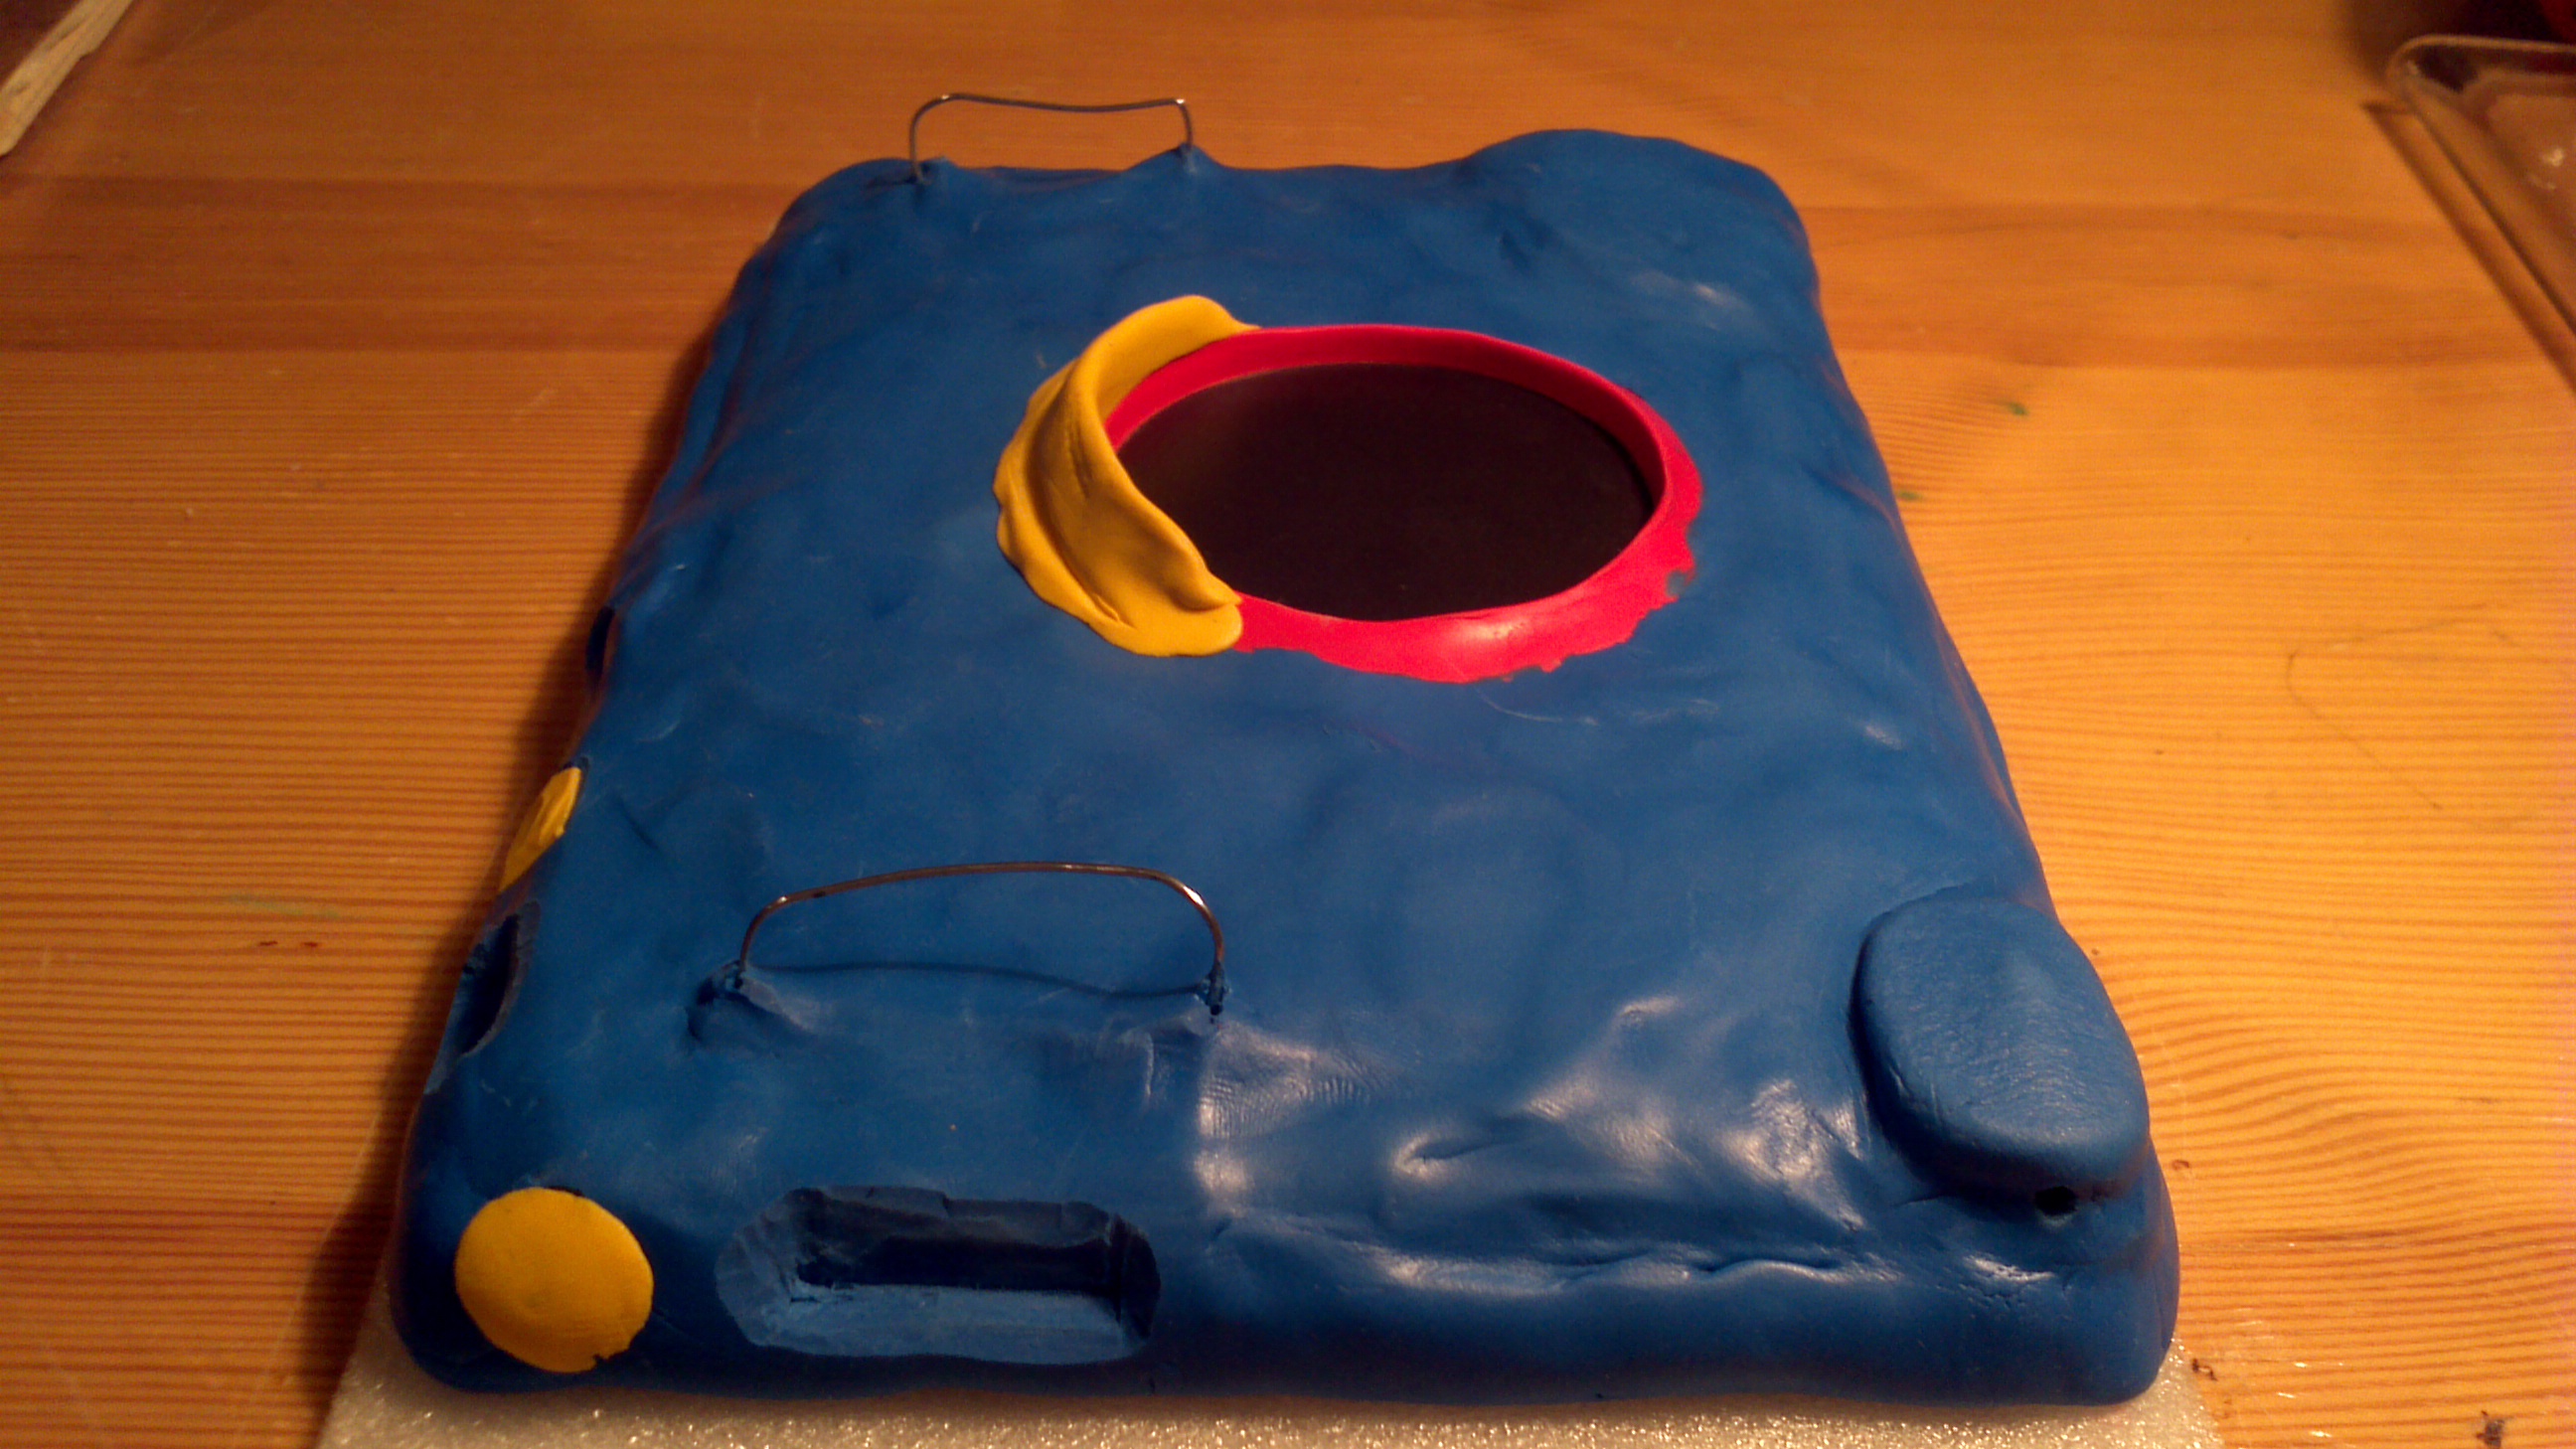
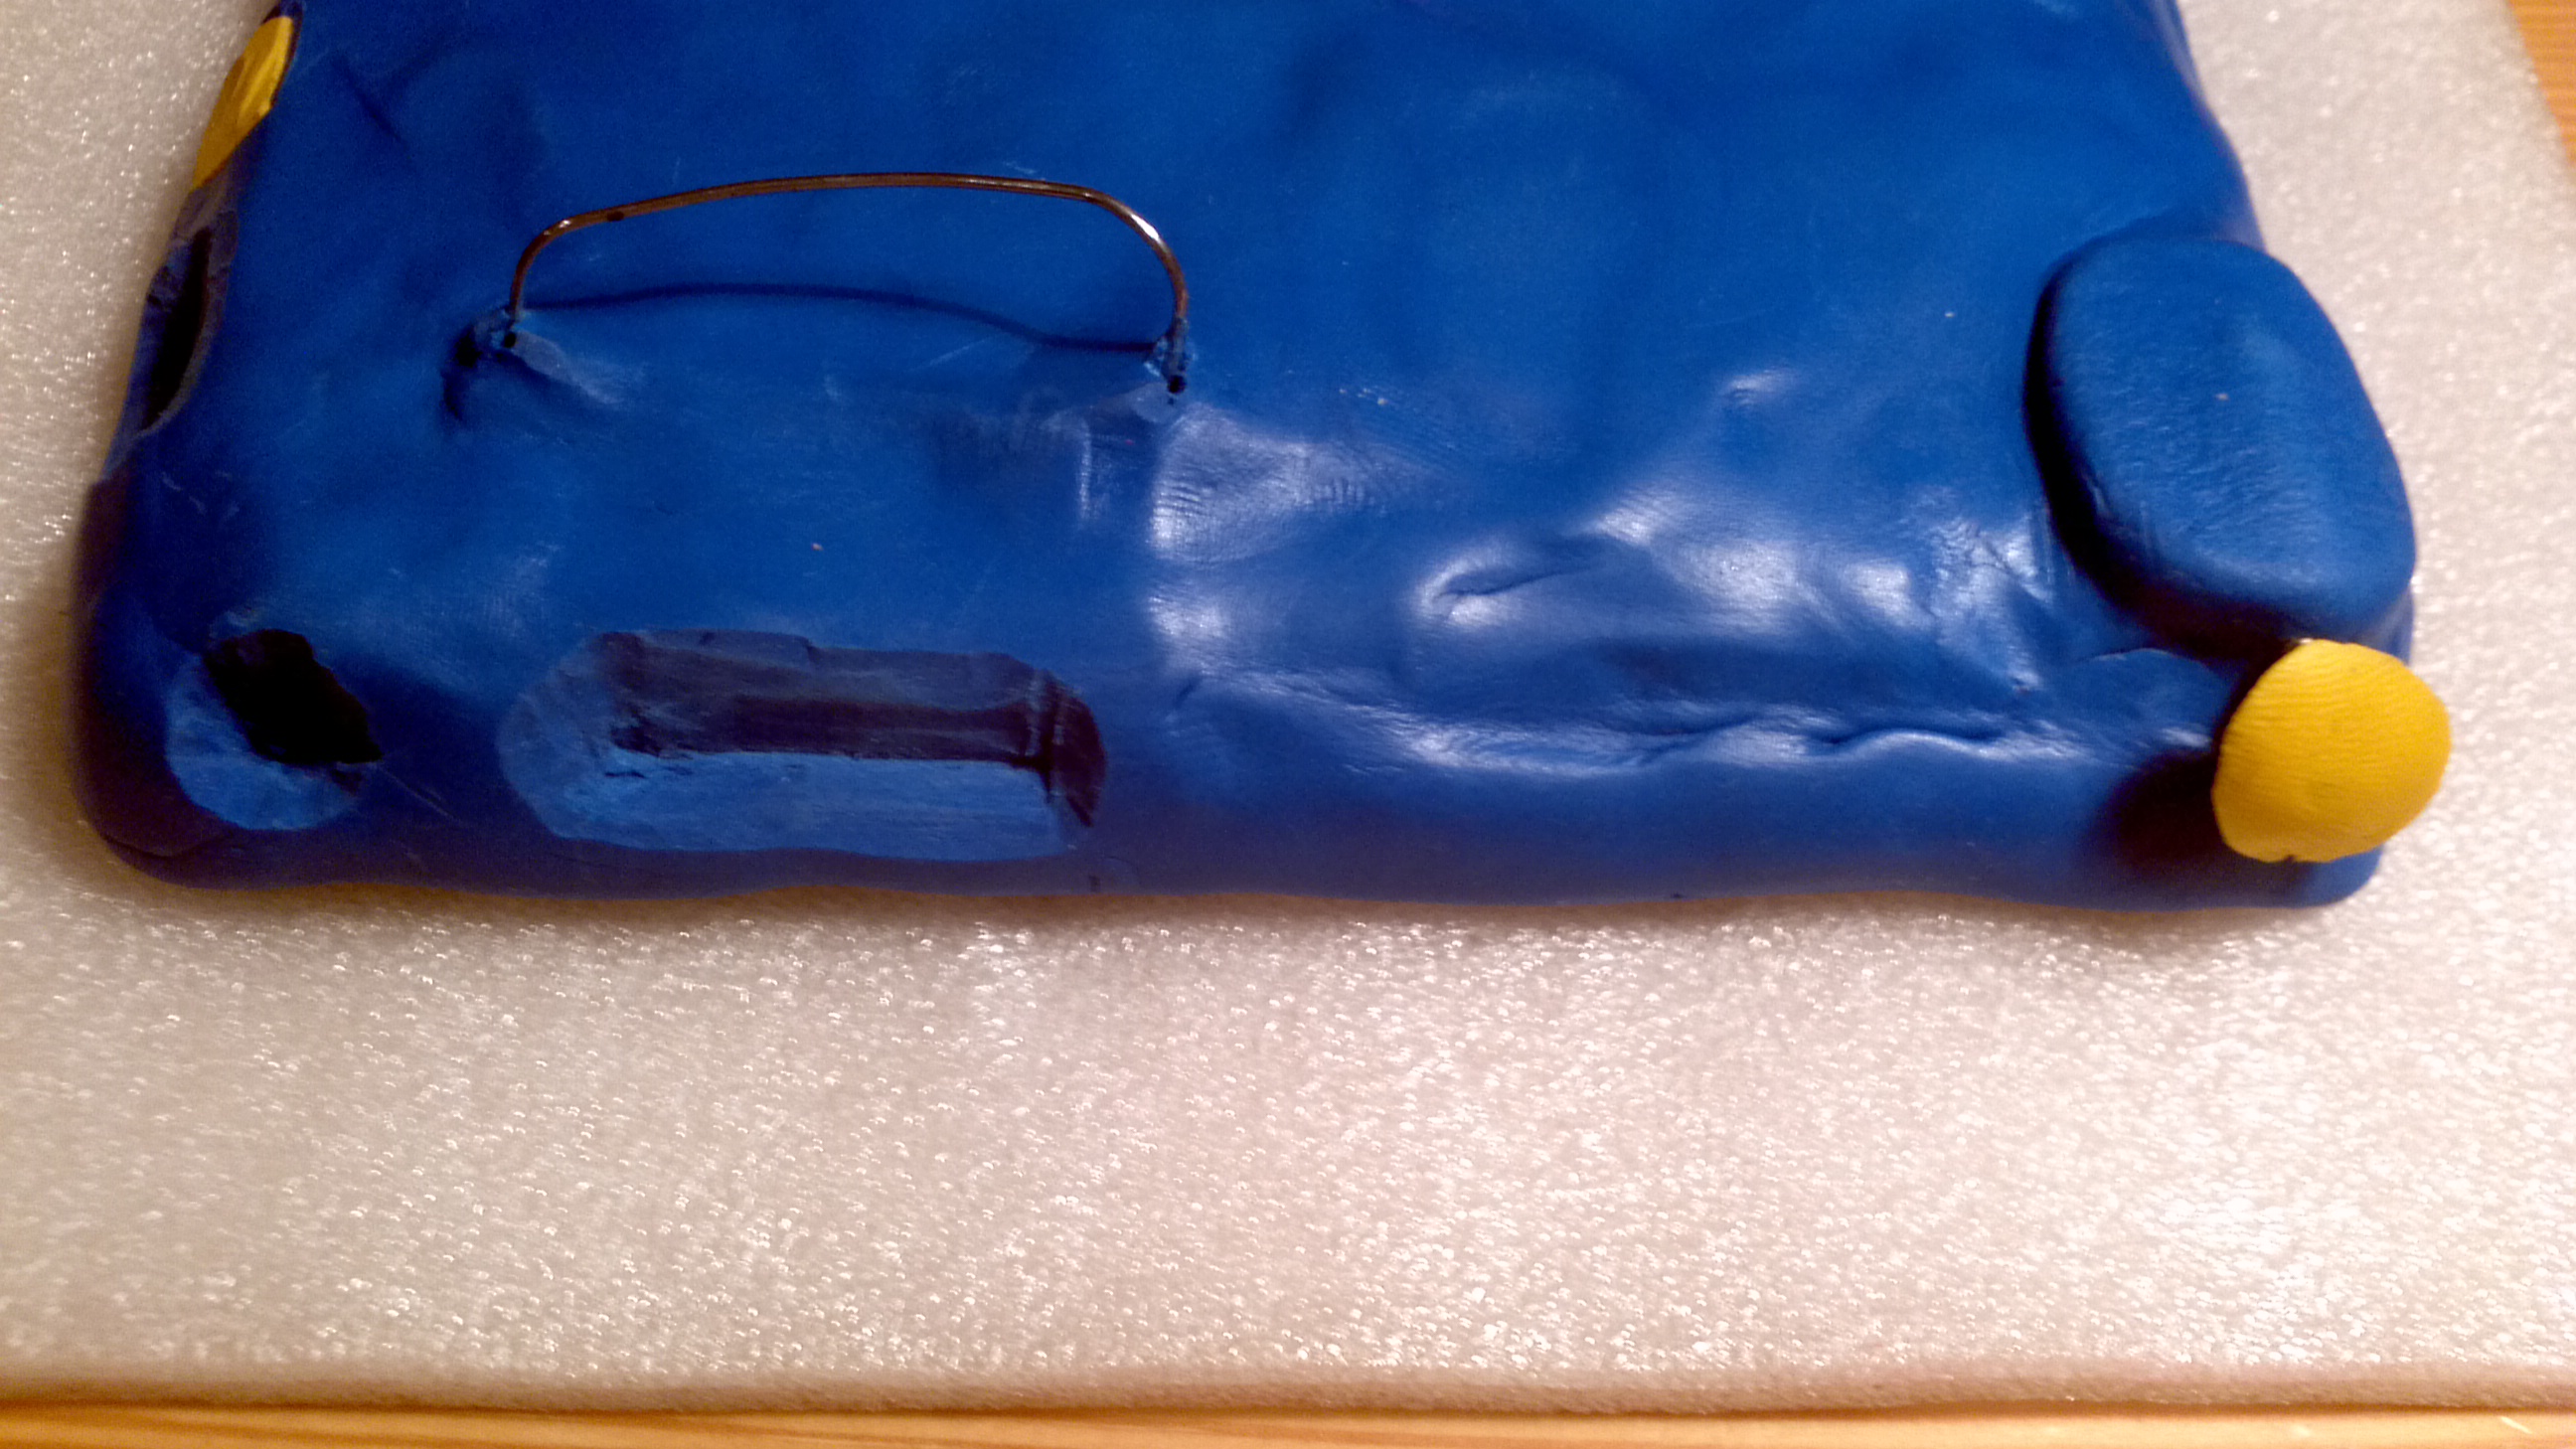
While we are inside the tablet I added some paper clip loops so that I could later add a strap to the tablet so that I could attach it to the back of a car seat for entertainment on long journeys or to secure it in other locations. This was simply achieved by making two small holes (1-2mm holes, 3-4cm apart) in the back panel at either side of the back panel, this can be done easily with a drill, but can also be achieved by twisting a small flat head screwdriver against the plastic. Bend the paper-clips so that they look like the first image below. Make sure that the ends of the paper-clips come together on the inside, then glue these ends together and to the back panel with some super-glue and cover with some tape to insulate them from the internal electronics (see the second image below). Then but the back panel back on.
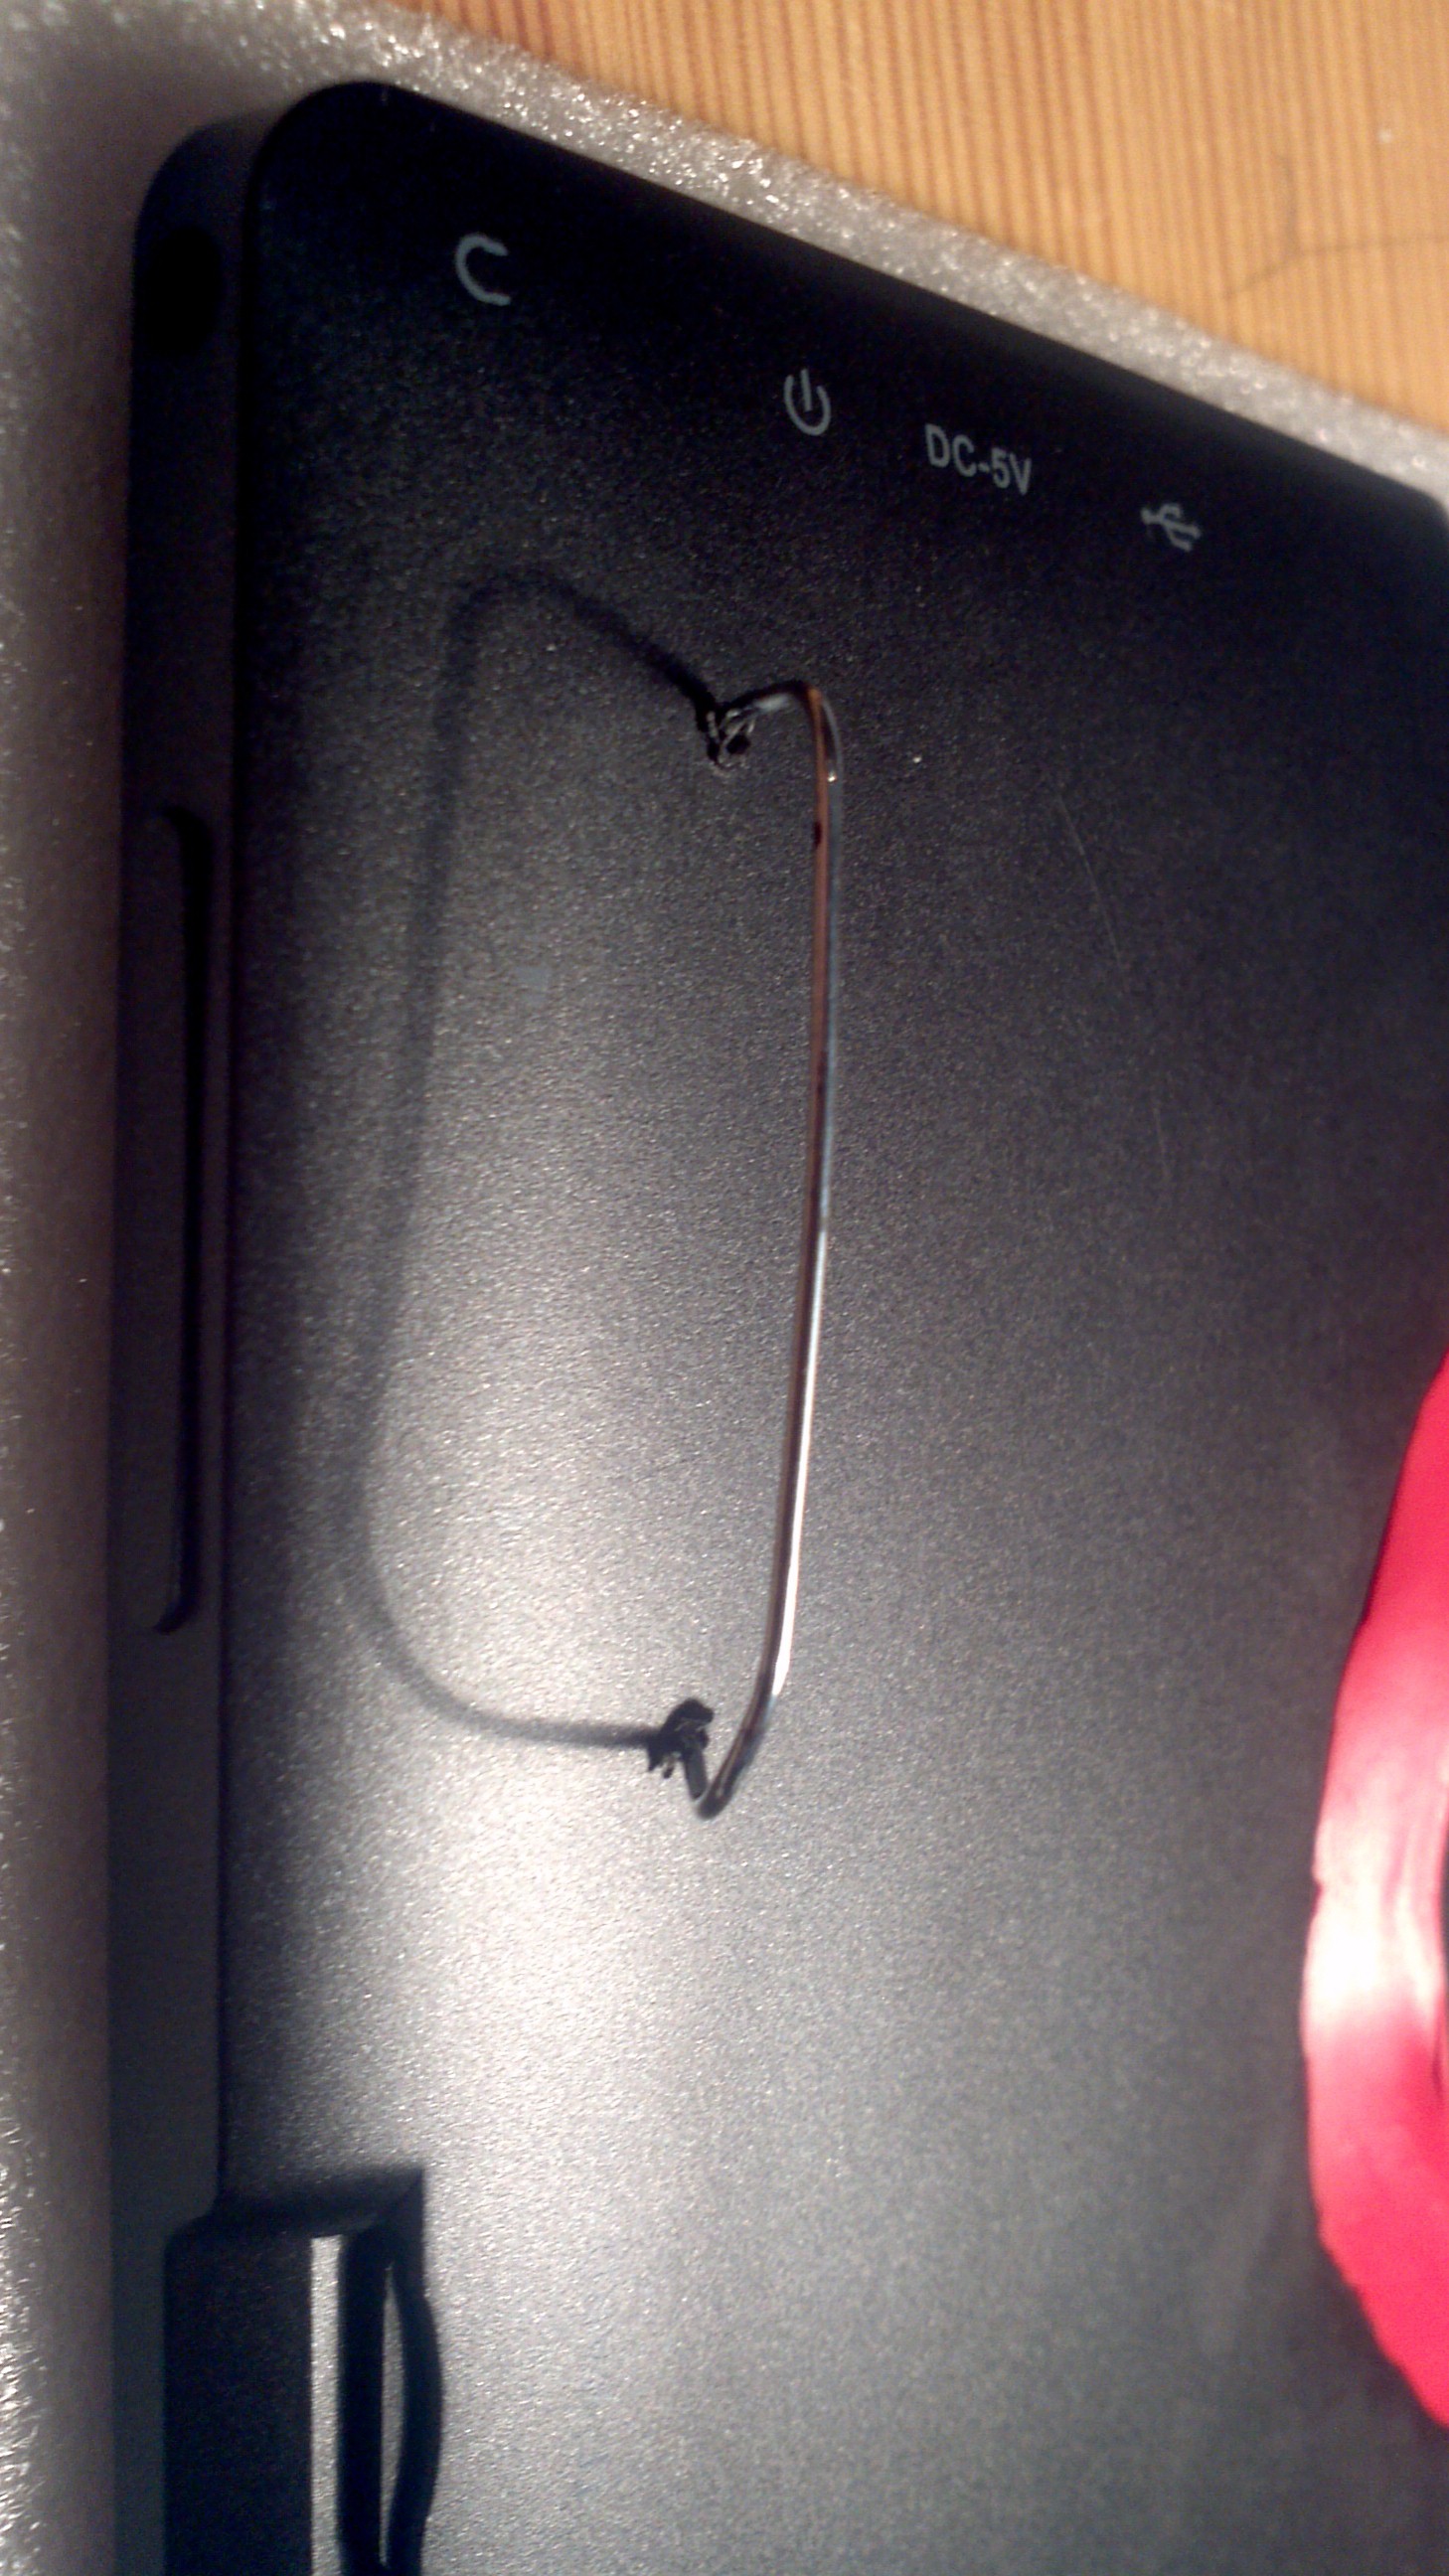
this is where a strap can be attached so that the tablet may be strapped to the back of a car seat or some other convenient location
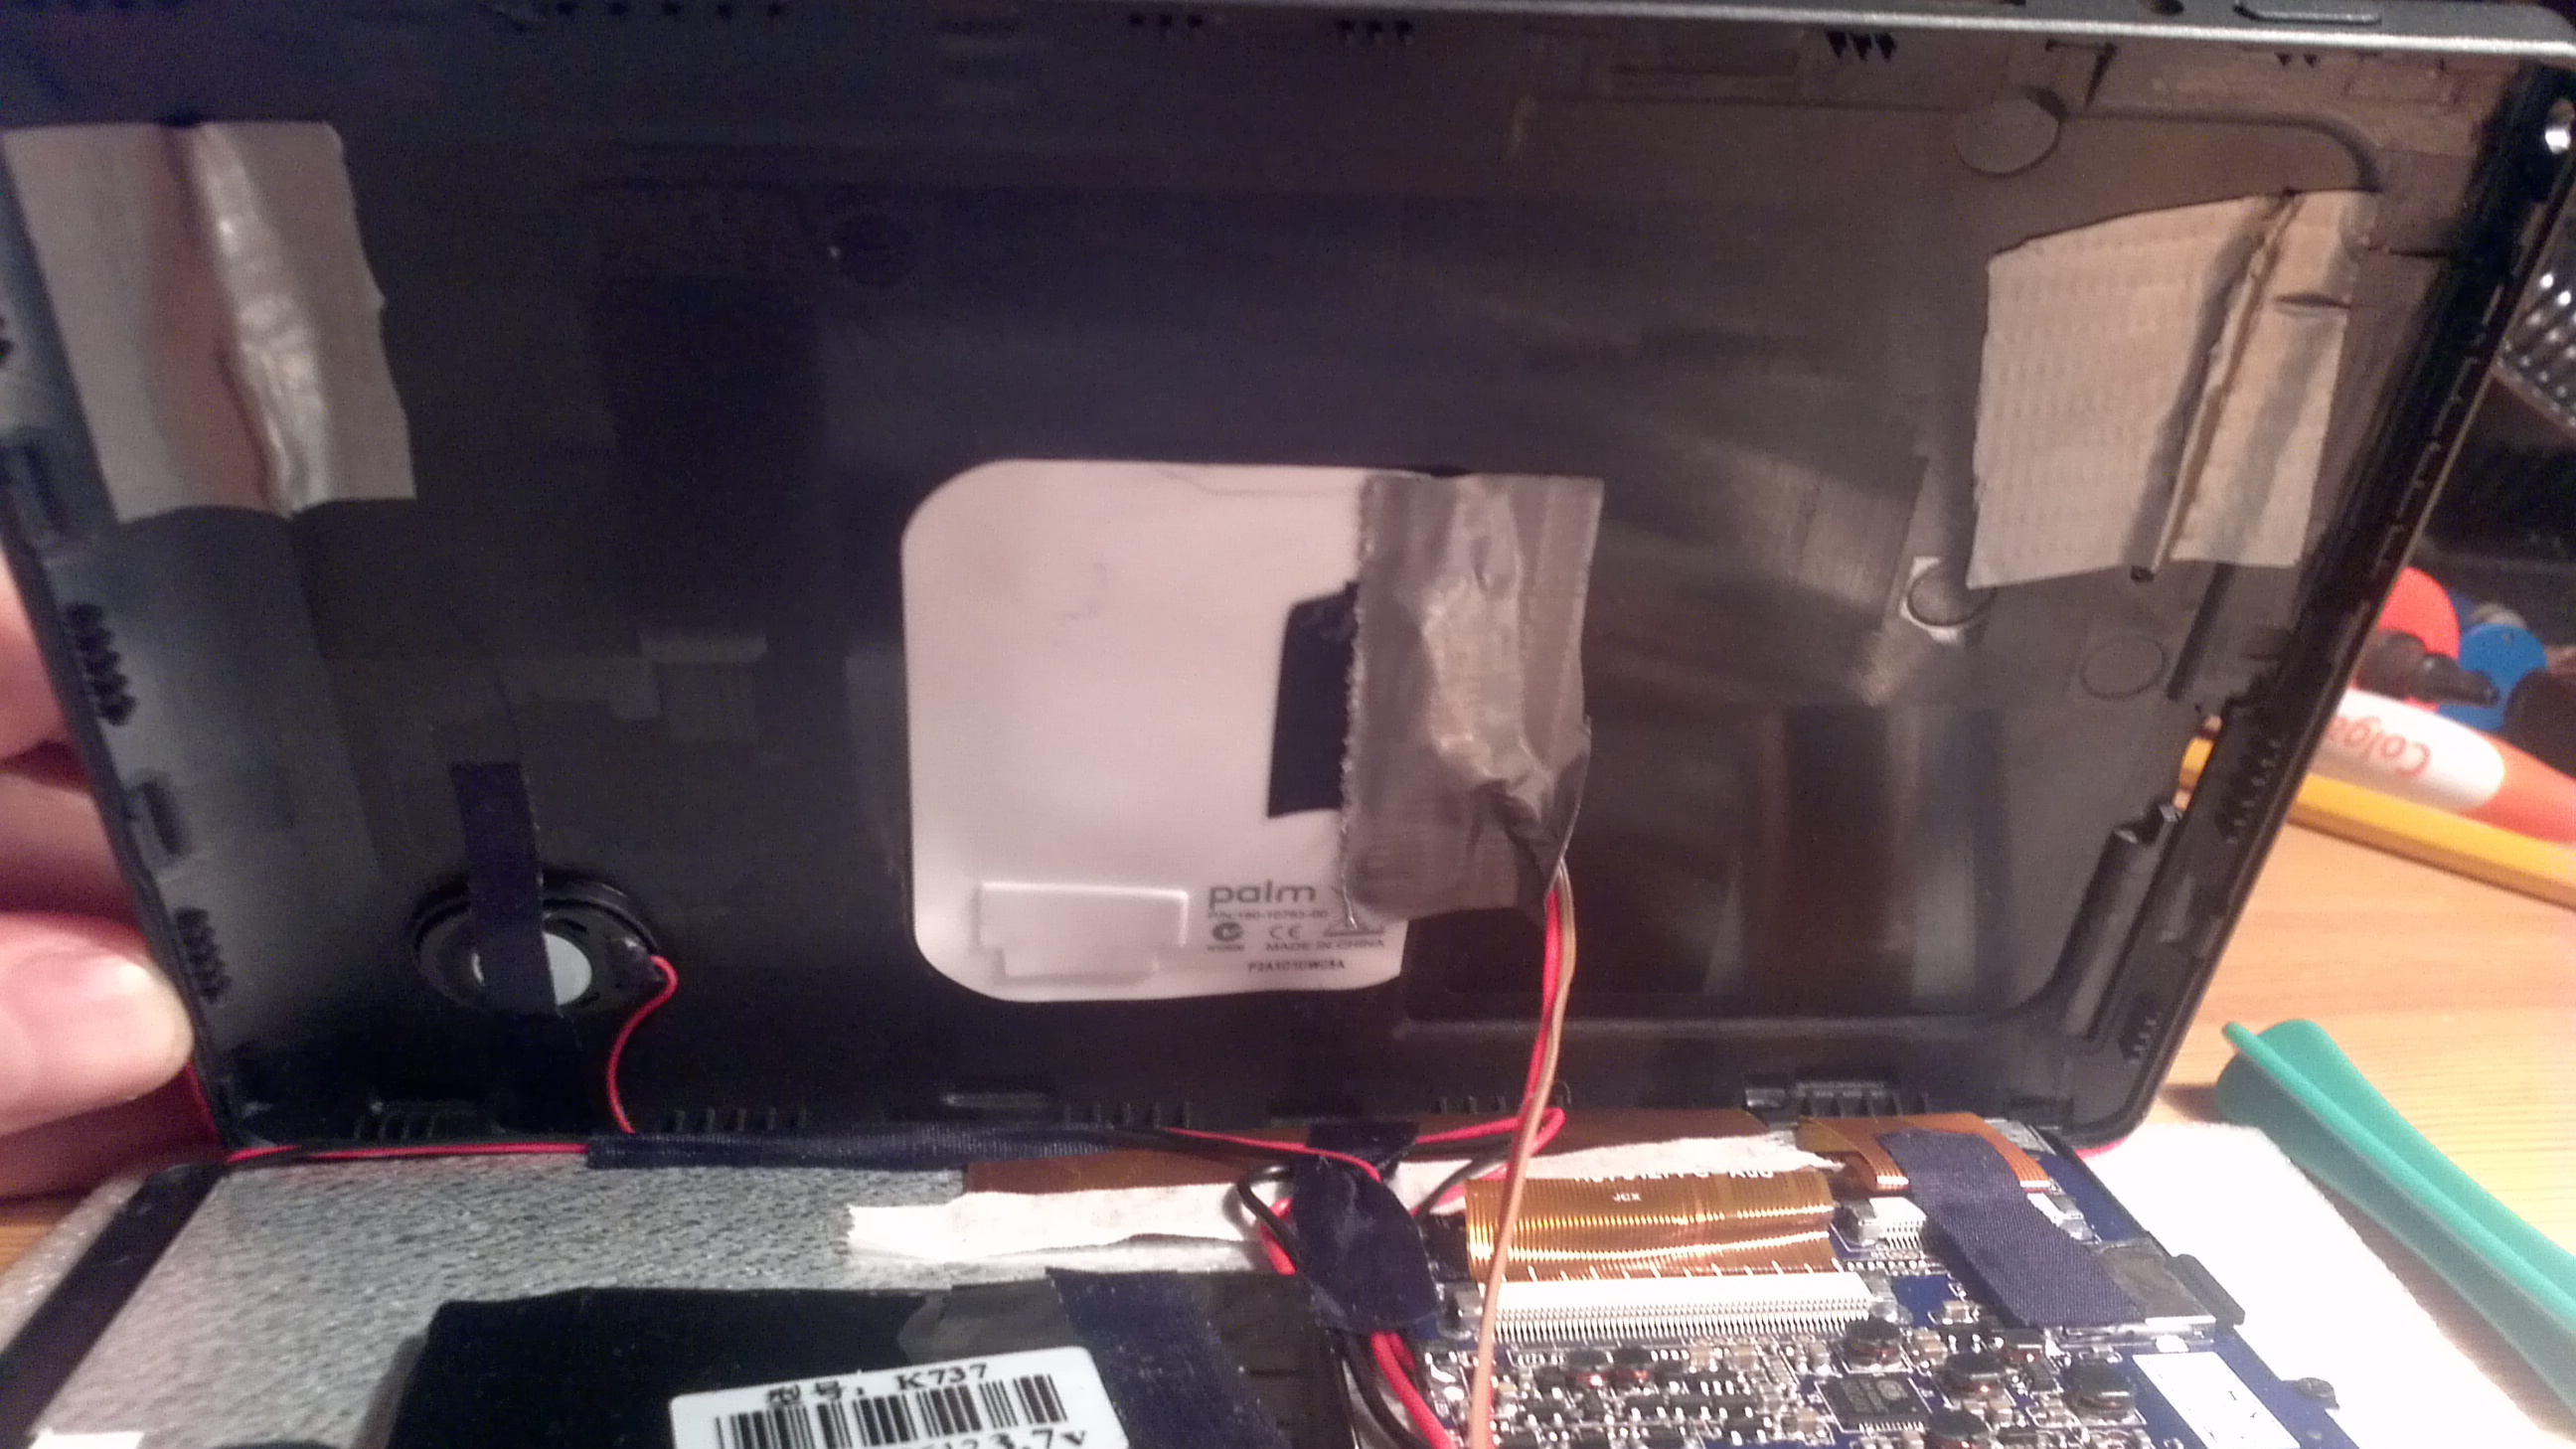
Internals with charging coil and paper-clip loop ends
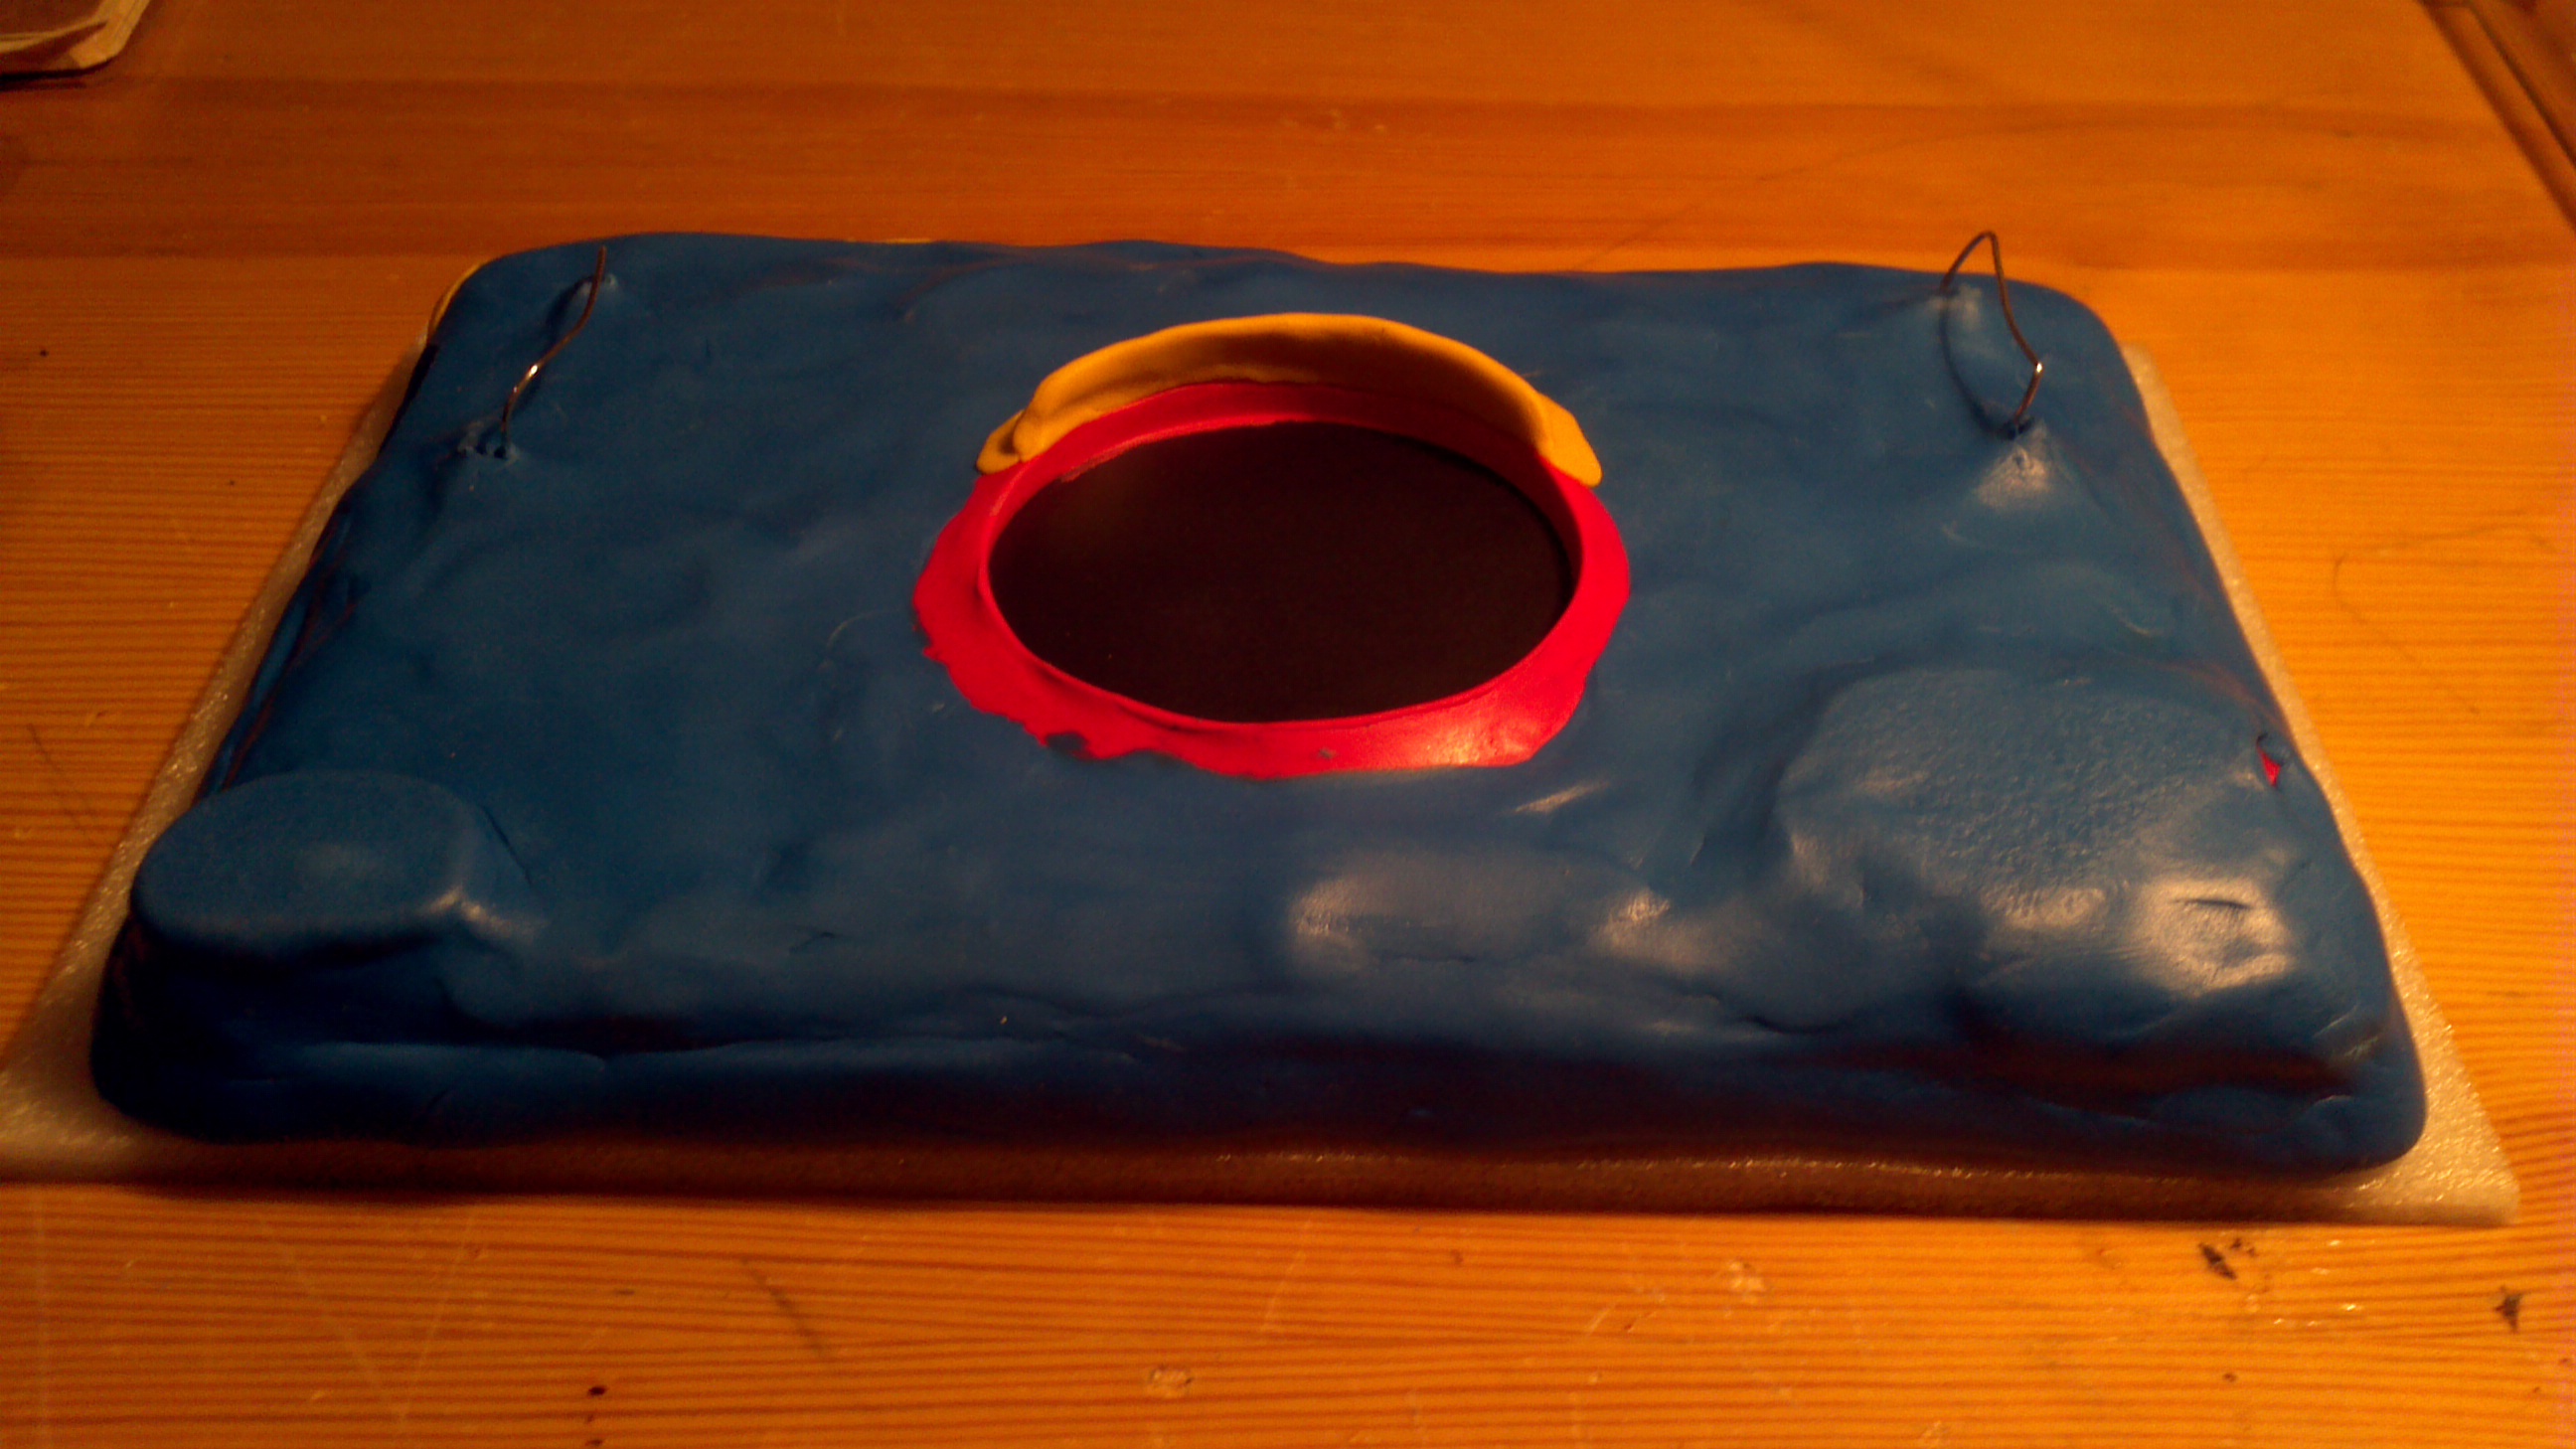
Now it’s time to start ruggedising the device. I started by wrapping the charging dock in cling film (plastic wrap) and placing it on the back panel (where it corresponds with the internal coil, it should “snap” into position anyway). Adding the cling film prevents the dock from becoming attached to the tablet, you can simply peel it off after the Sugru has cured. I then added Sugru around the dock (see the image below). I also added some Sugru around the speaker, this was a first step to protect the speaker. Let the Sugru cure for 12-24 hrs.
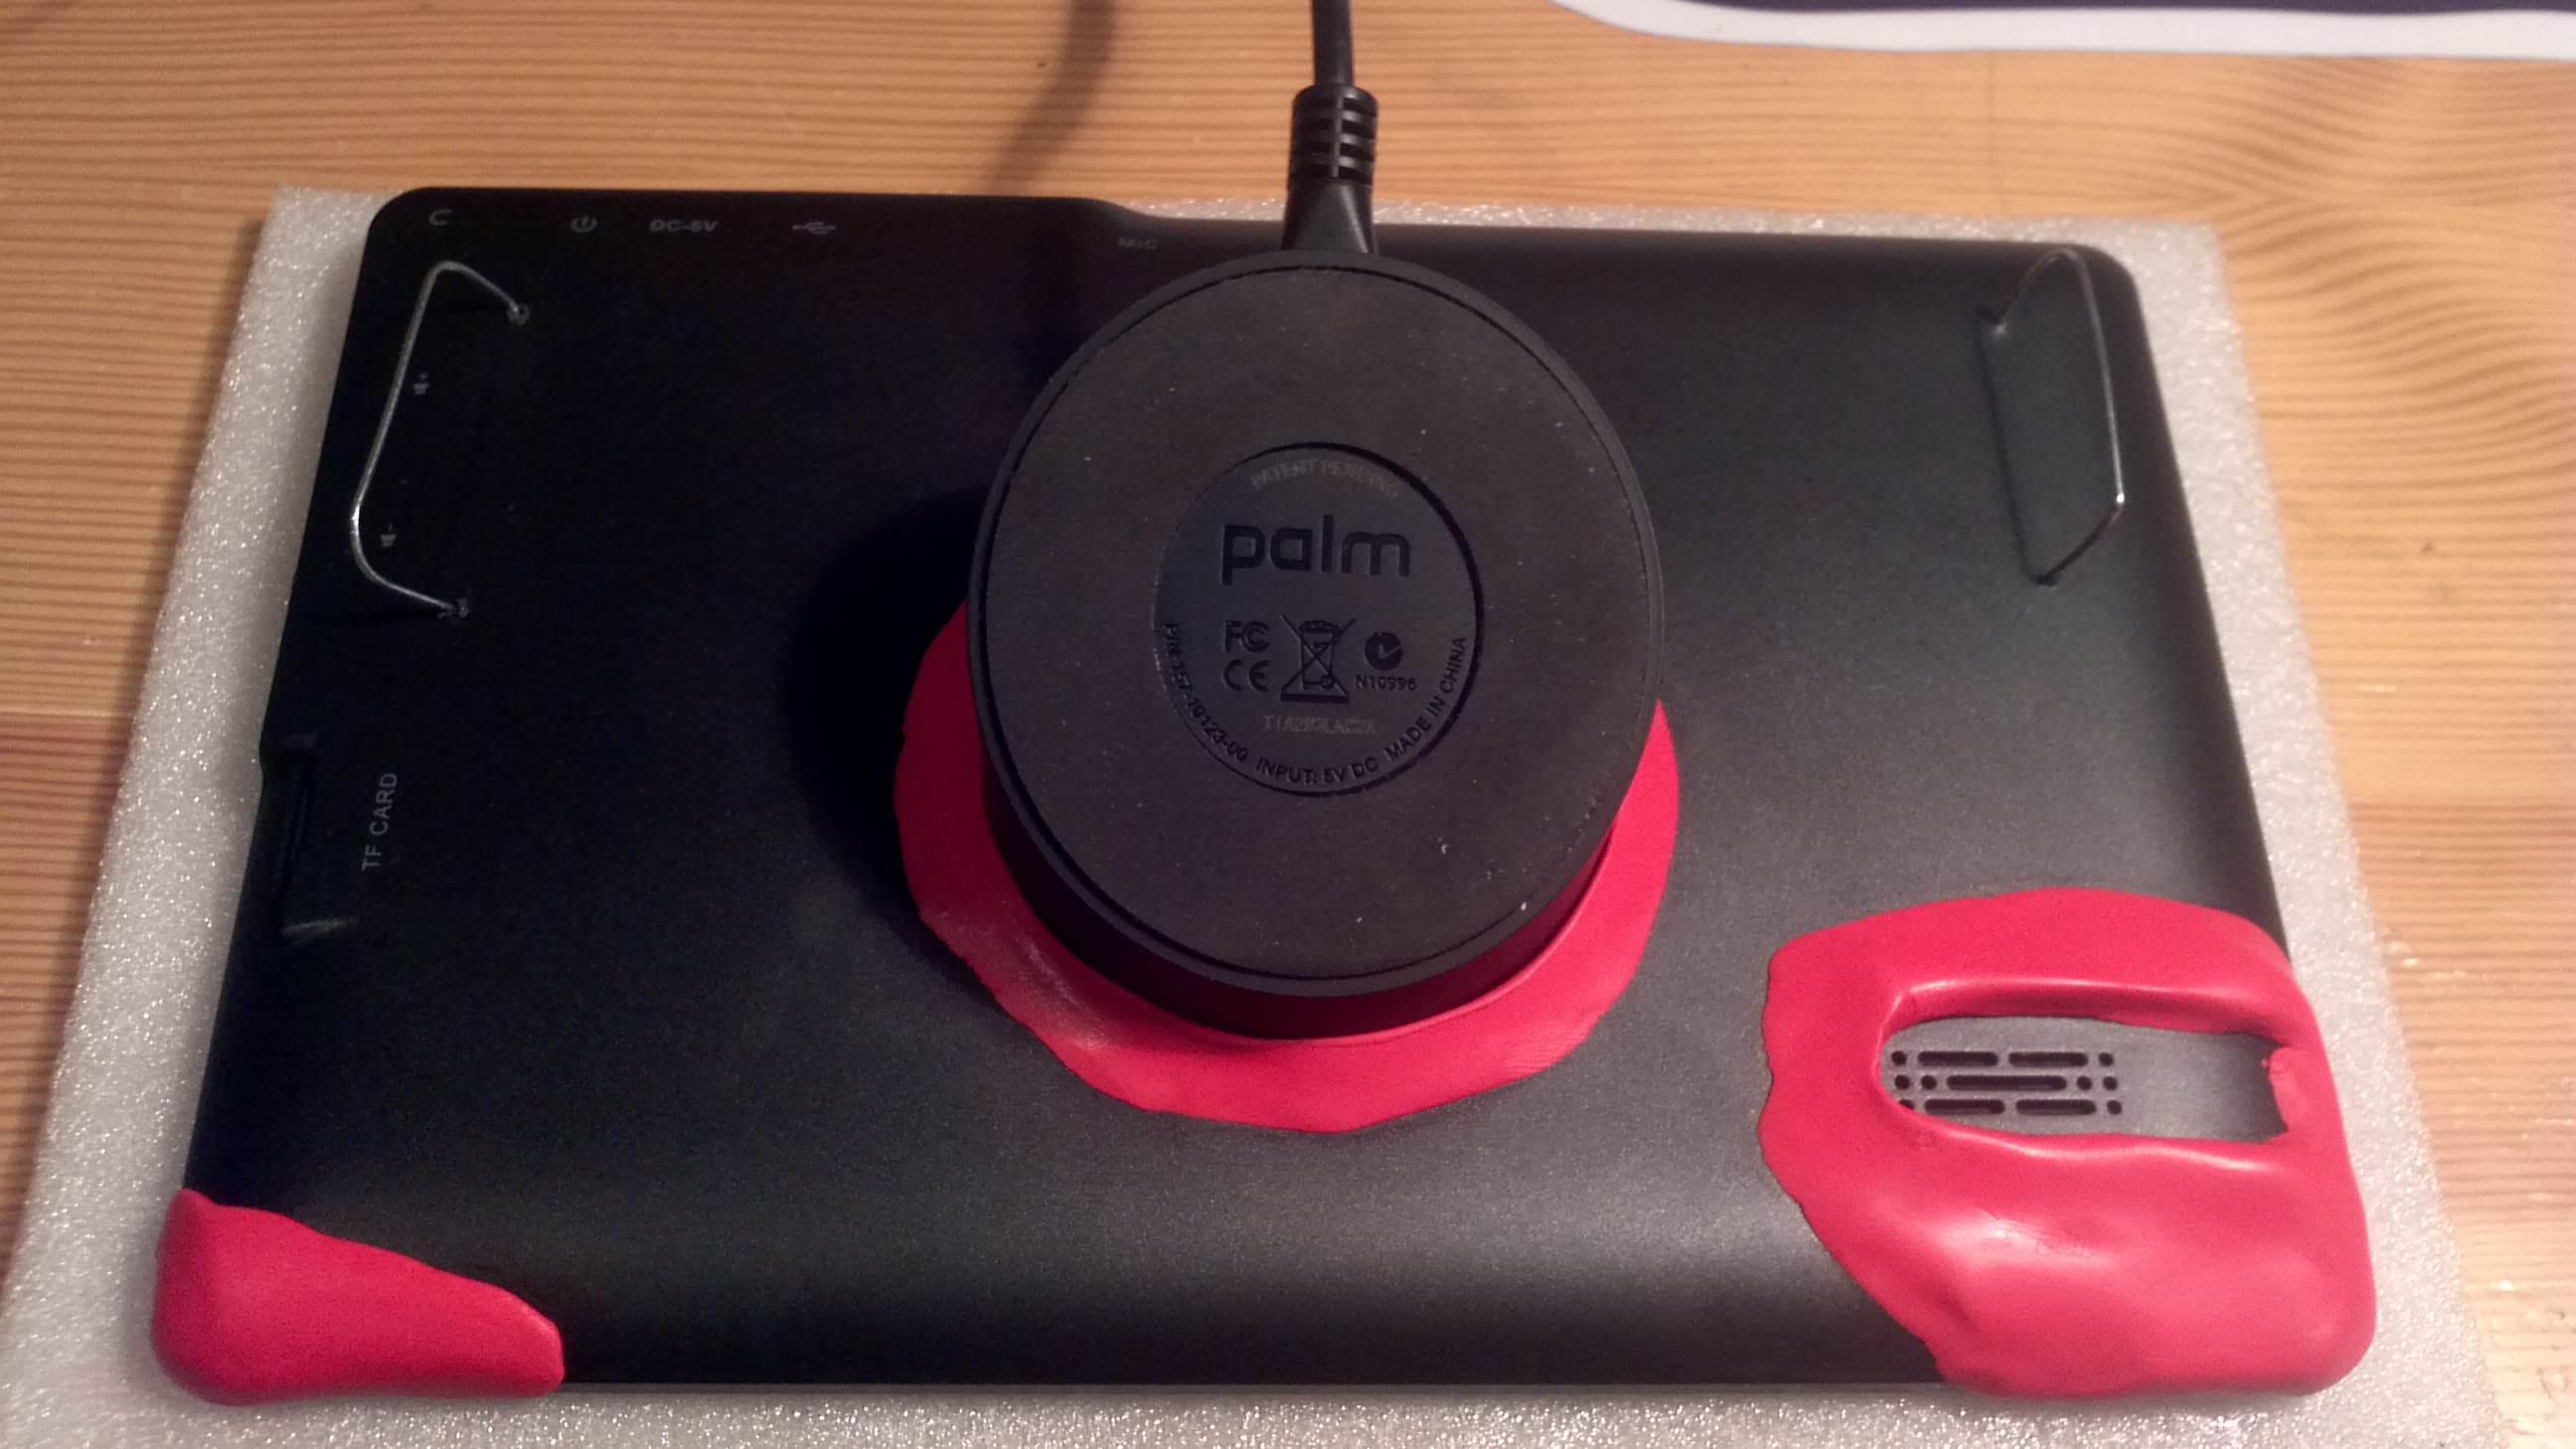
Back View testing the charger position and Speaker first layer protection
Now we are ready to fully ruggedise the device.
Note: after this step you will not (without damaging the protection we are going to apply) be able to open the device or insert an SD card. Therefore make sure everything is working with the wireless charging and that you insert a micro-SD card if you want extra storage. Preferably load the SD card with your toddlers favourite cartoons or other educational material (I added a bunch of space photos), the bigger the card the better, but you will still/always be able to alter the contents via the USB connection.
First get the USB micro connector (male) and 3.5mm audio jack connector (male), see below.
-
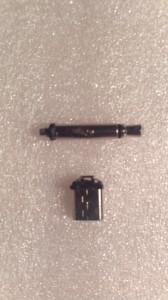
USB and stereo jack before Sugru application
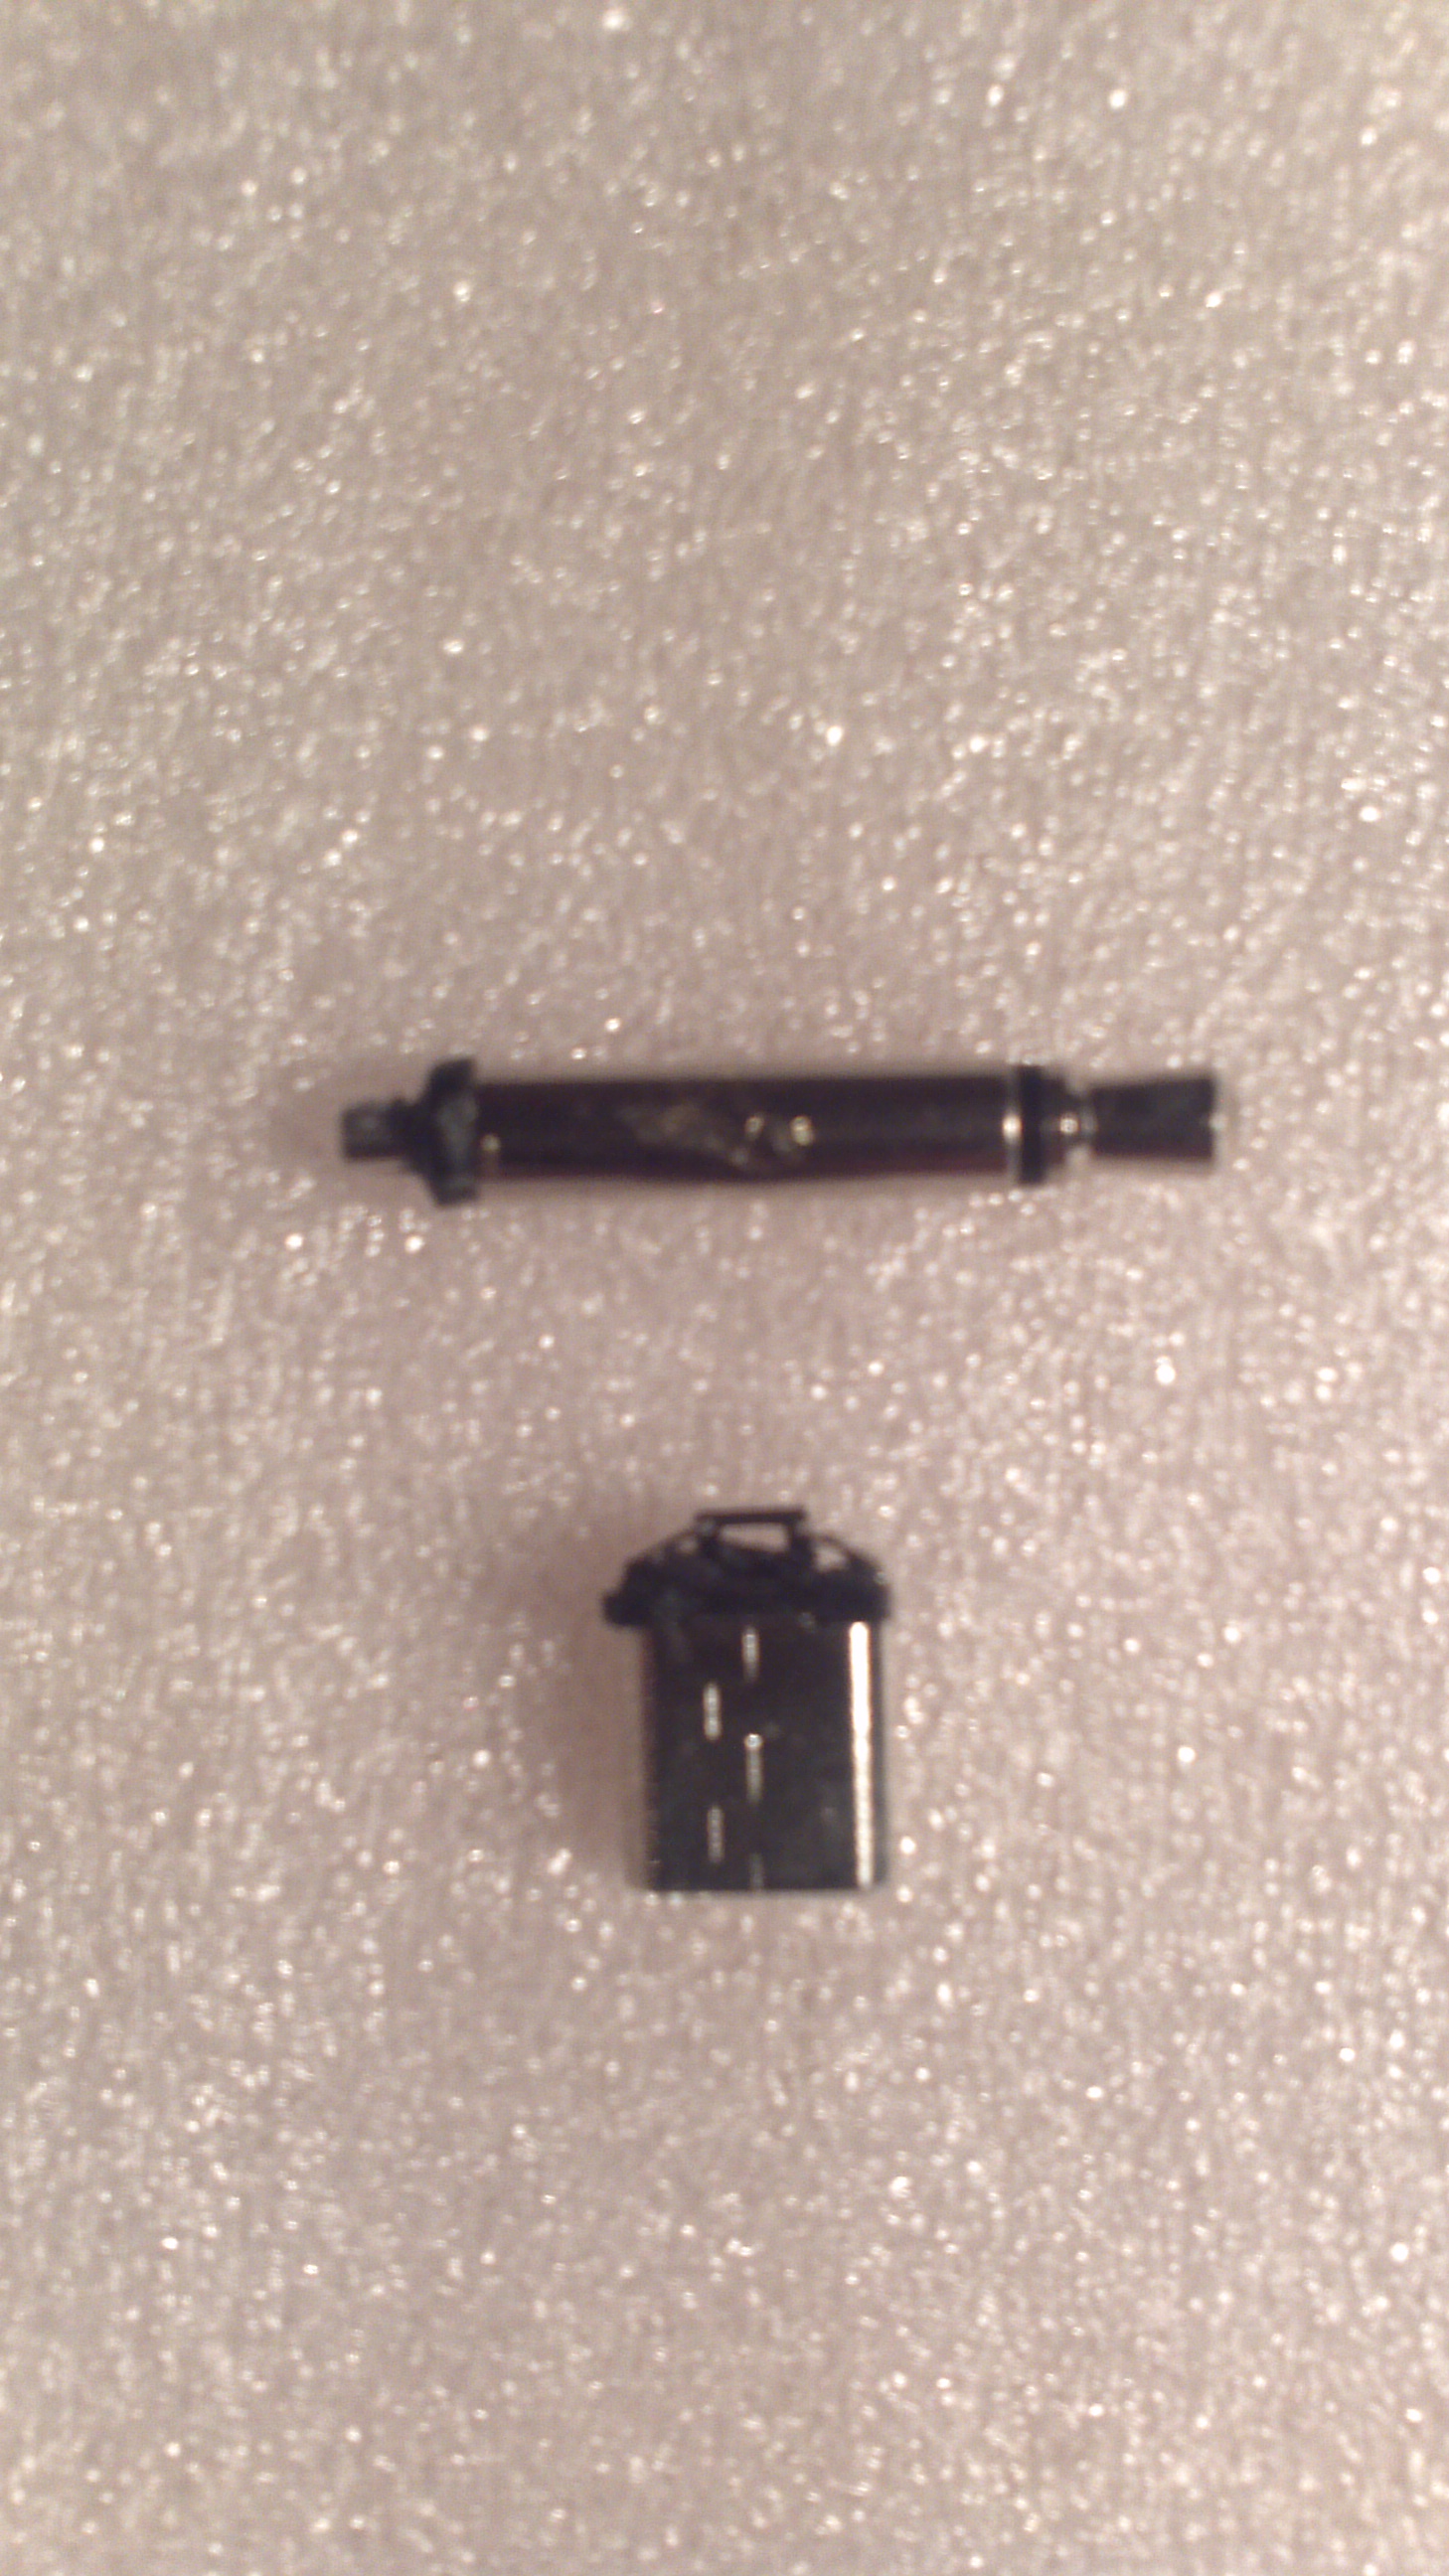
Wrap them in cling film (plastic wrap) and insert them into the tablet, see below. Again the idea is that you can remove these after you apply Sugru to the whole tablet.
USB and stereo jack in tablet before Sugru application
Now it’s time to apply Sugru to the whole tablet, in preparation I taped a piece of card to the front of the screen (and left the original screen protecting plastic it came with) so that I didn’t have to worry about getting Sugru on it. I also added a small bit of card over the speaker Sugru so that I could make a small Sugru bridge over it, essentially leaving a hole at the side for the sound to get out. It is best to do this process in two runs, first do the front and let it cure, then the back, this allows you to create a ridge on the front that stick both outwards and upwards, this will protect the screen from drops. Then apply Sugru to the back (this allows you to rest the device on the other side without deforming the Sugru as it cures, alternatively you could just support it using the screen). Once the Sugru had cured the USB connector and stereo jack were removed and a blade was used to widen the holes and carve away portions of the Sugru to allow access to the buttons (taking note of their positions beforehand is important). With the blade slowly remove layers of Sugru until the buttons react to pressing, you shouldn’t need to expose the button itself. It should look something like the images below.
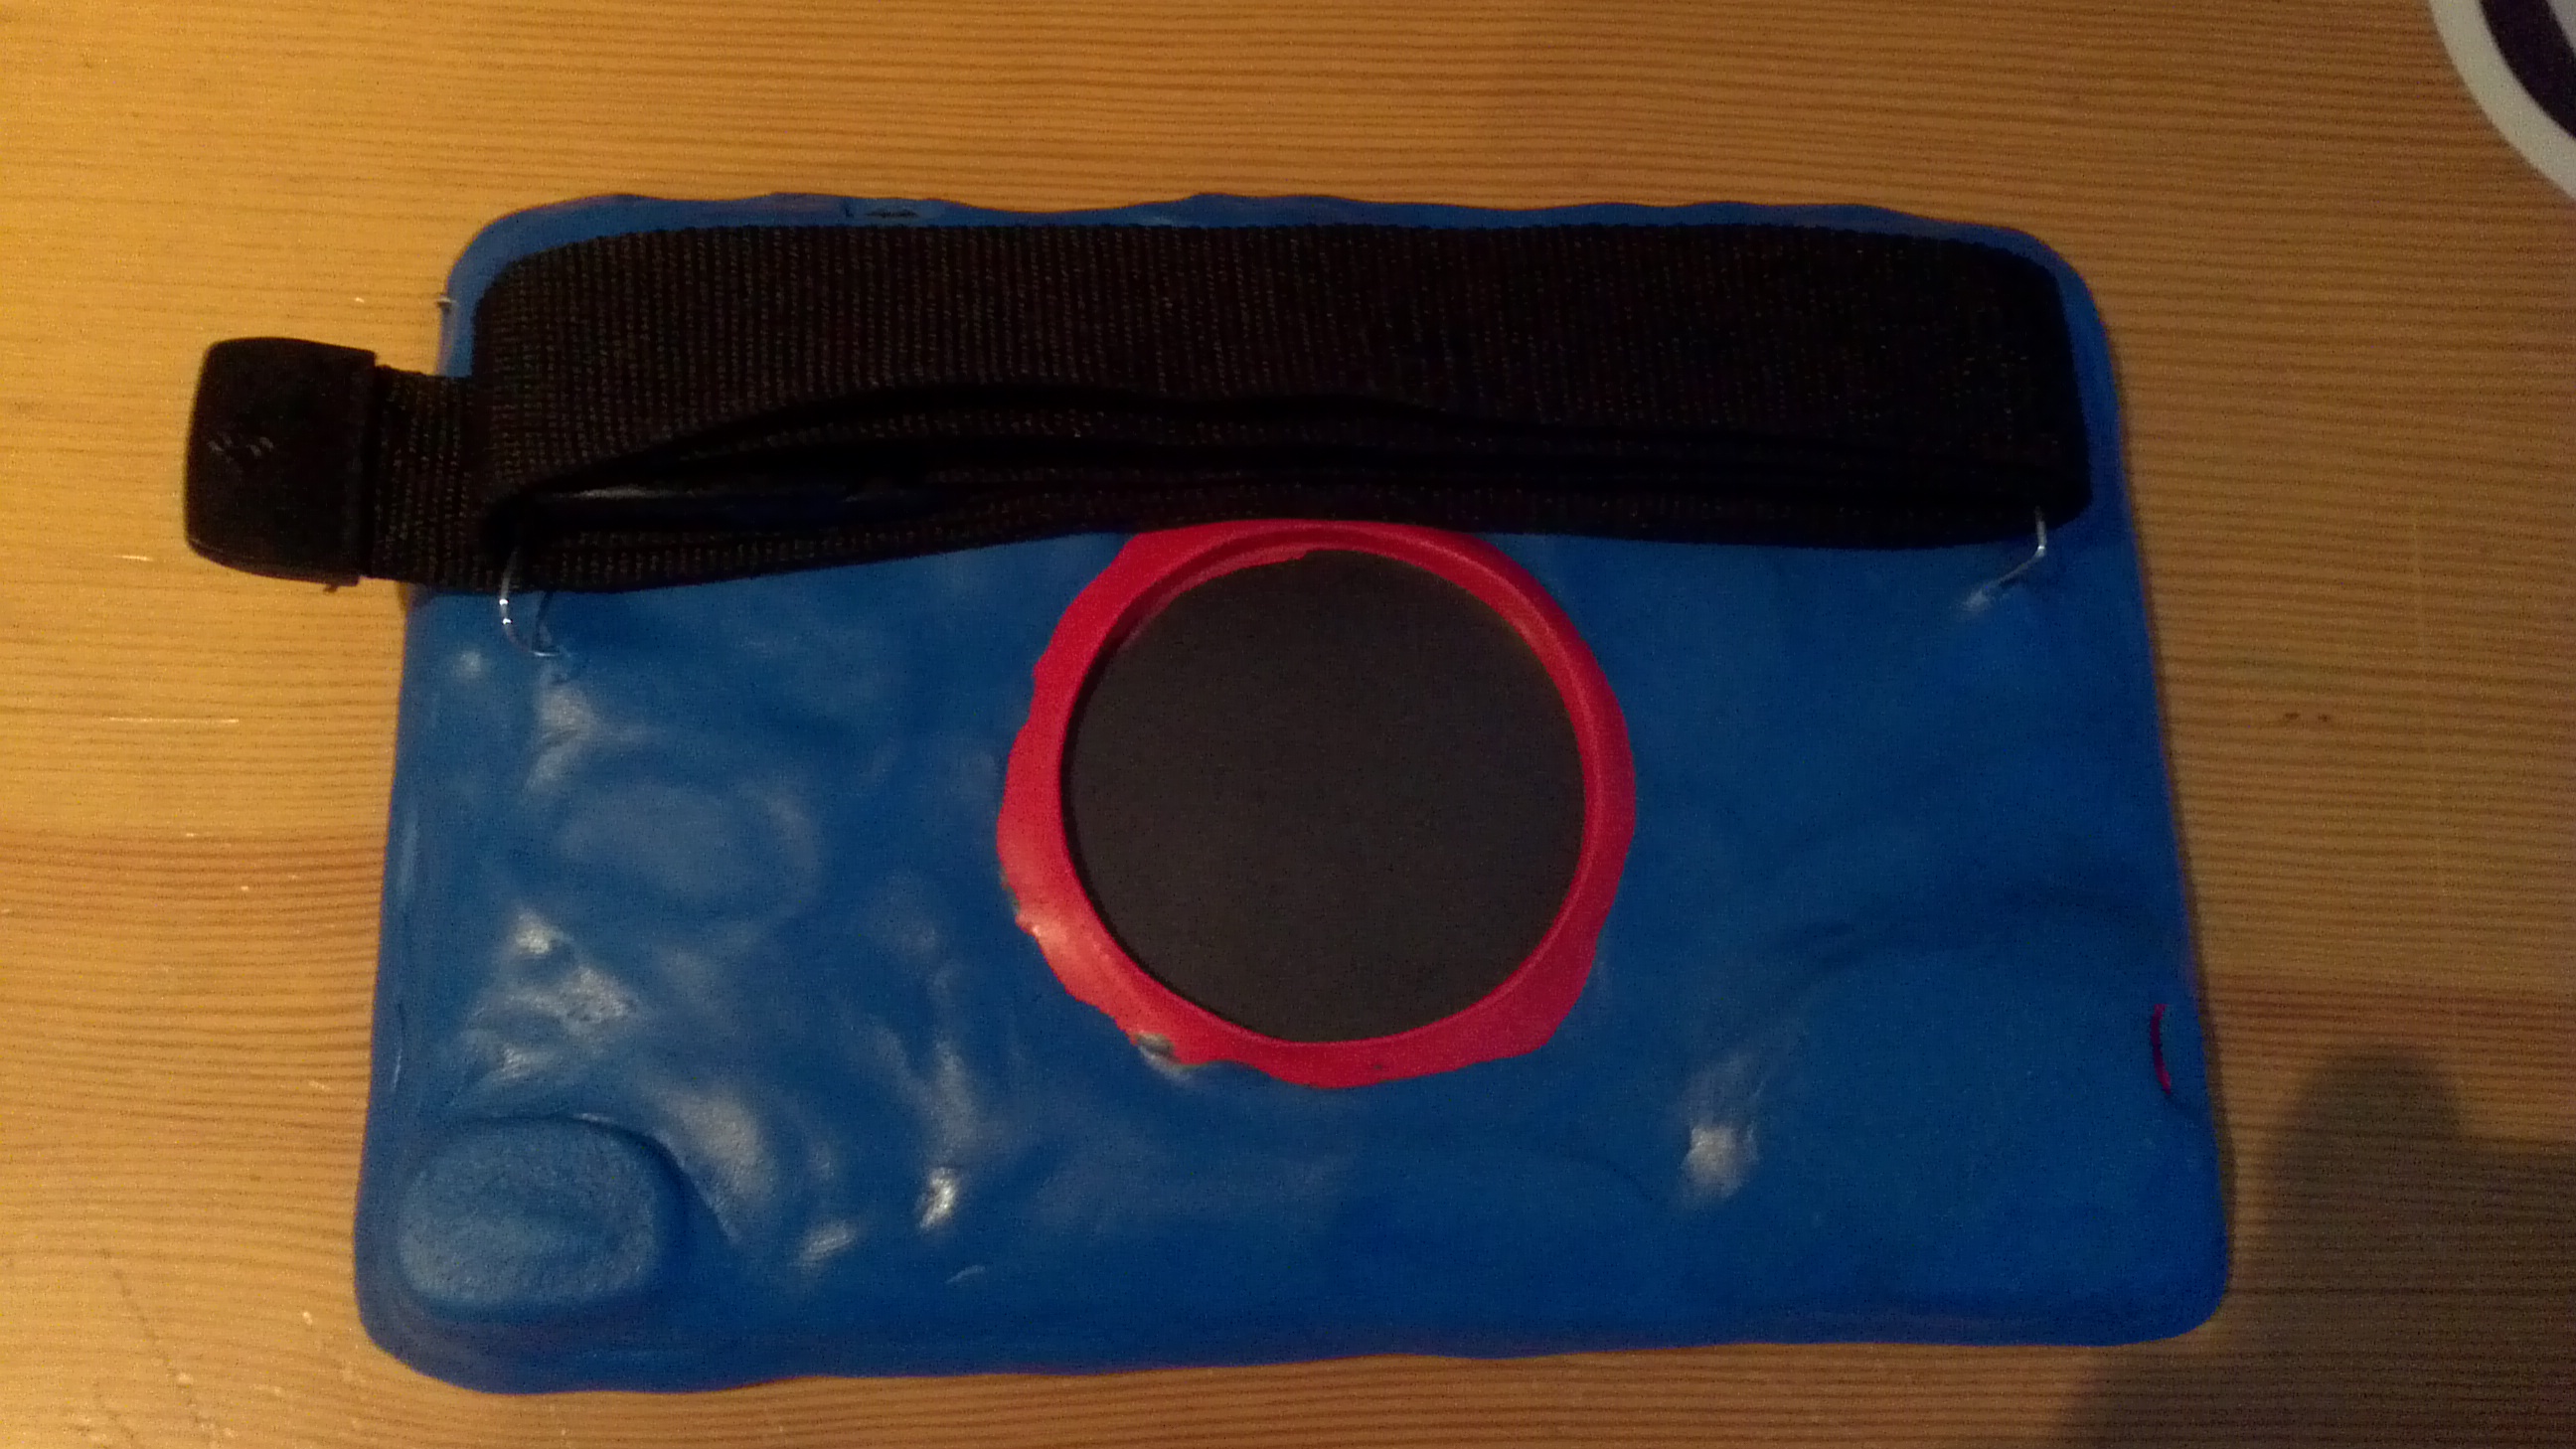
Finished Back View with Strap
Finished Front view

Finished Back View with Wireless Charger
Finished Left View
Finished Back View
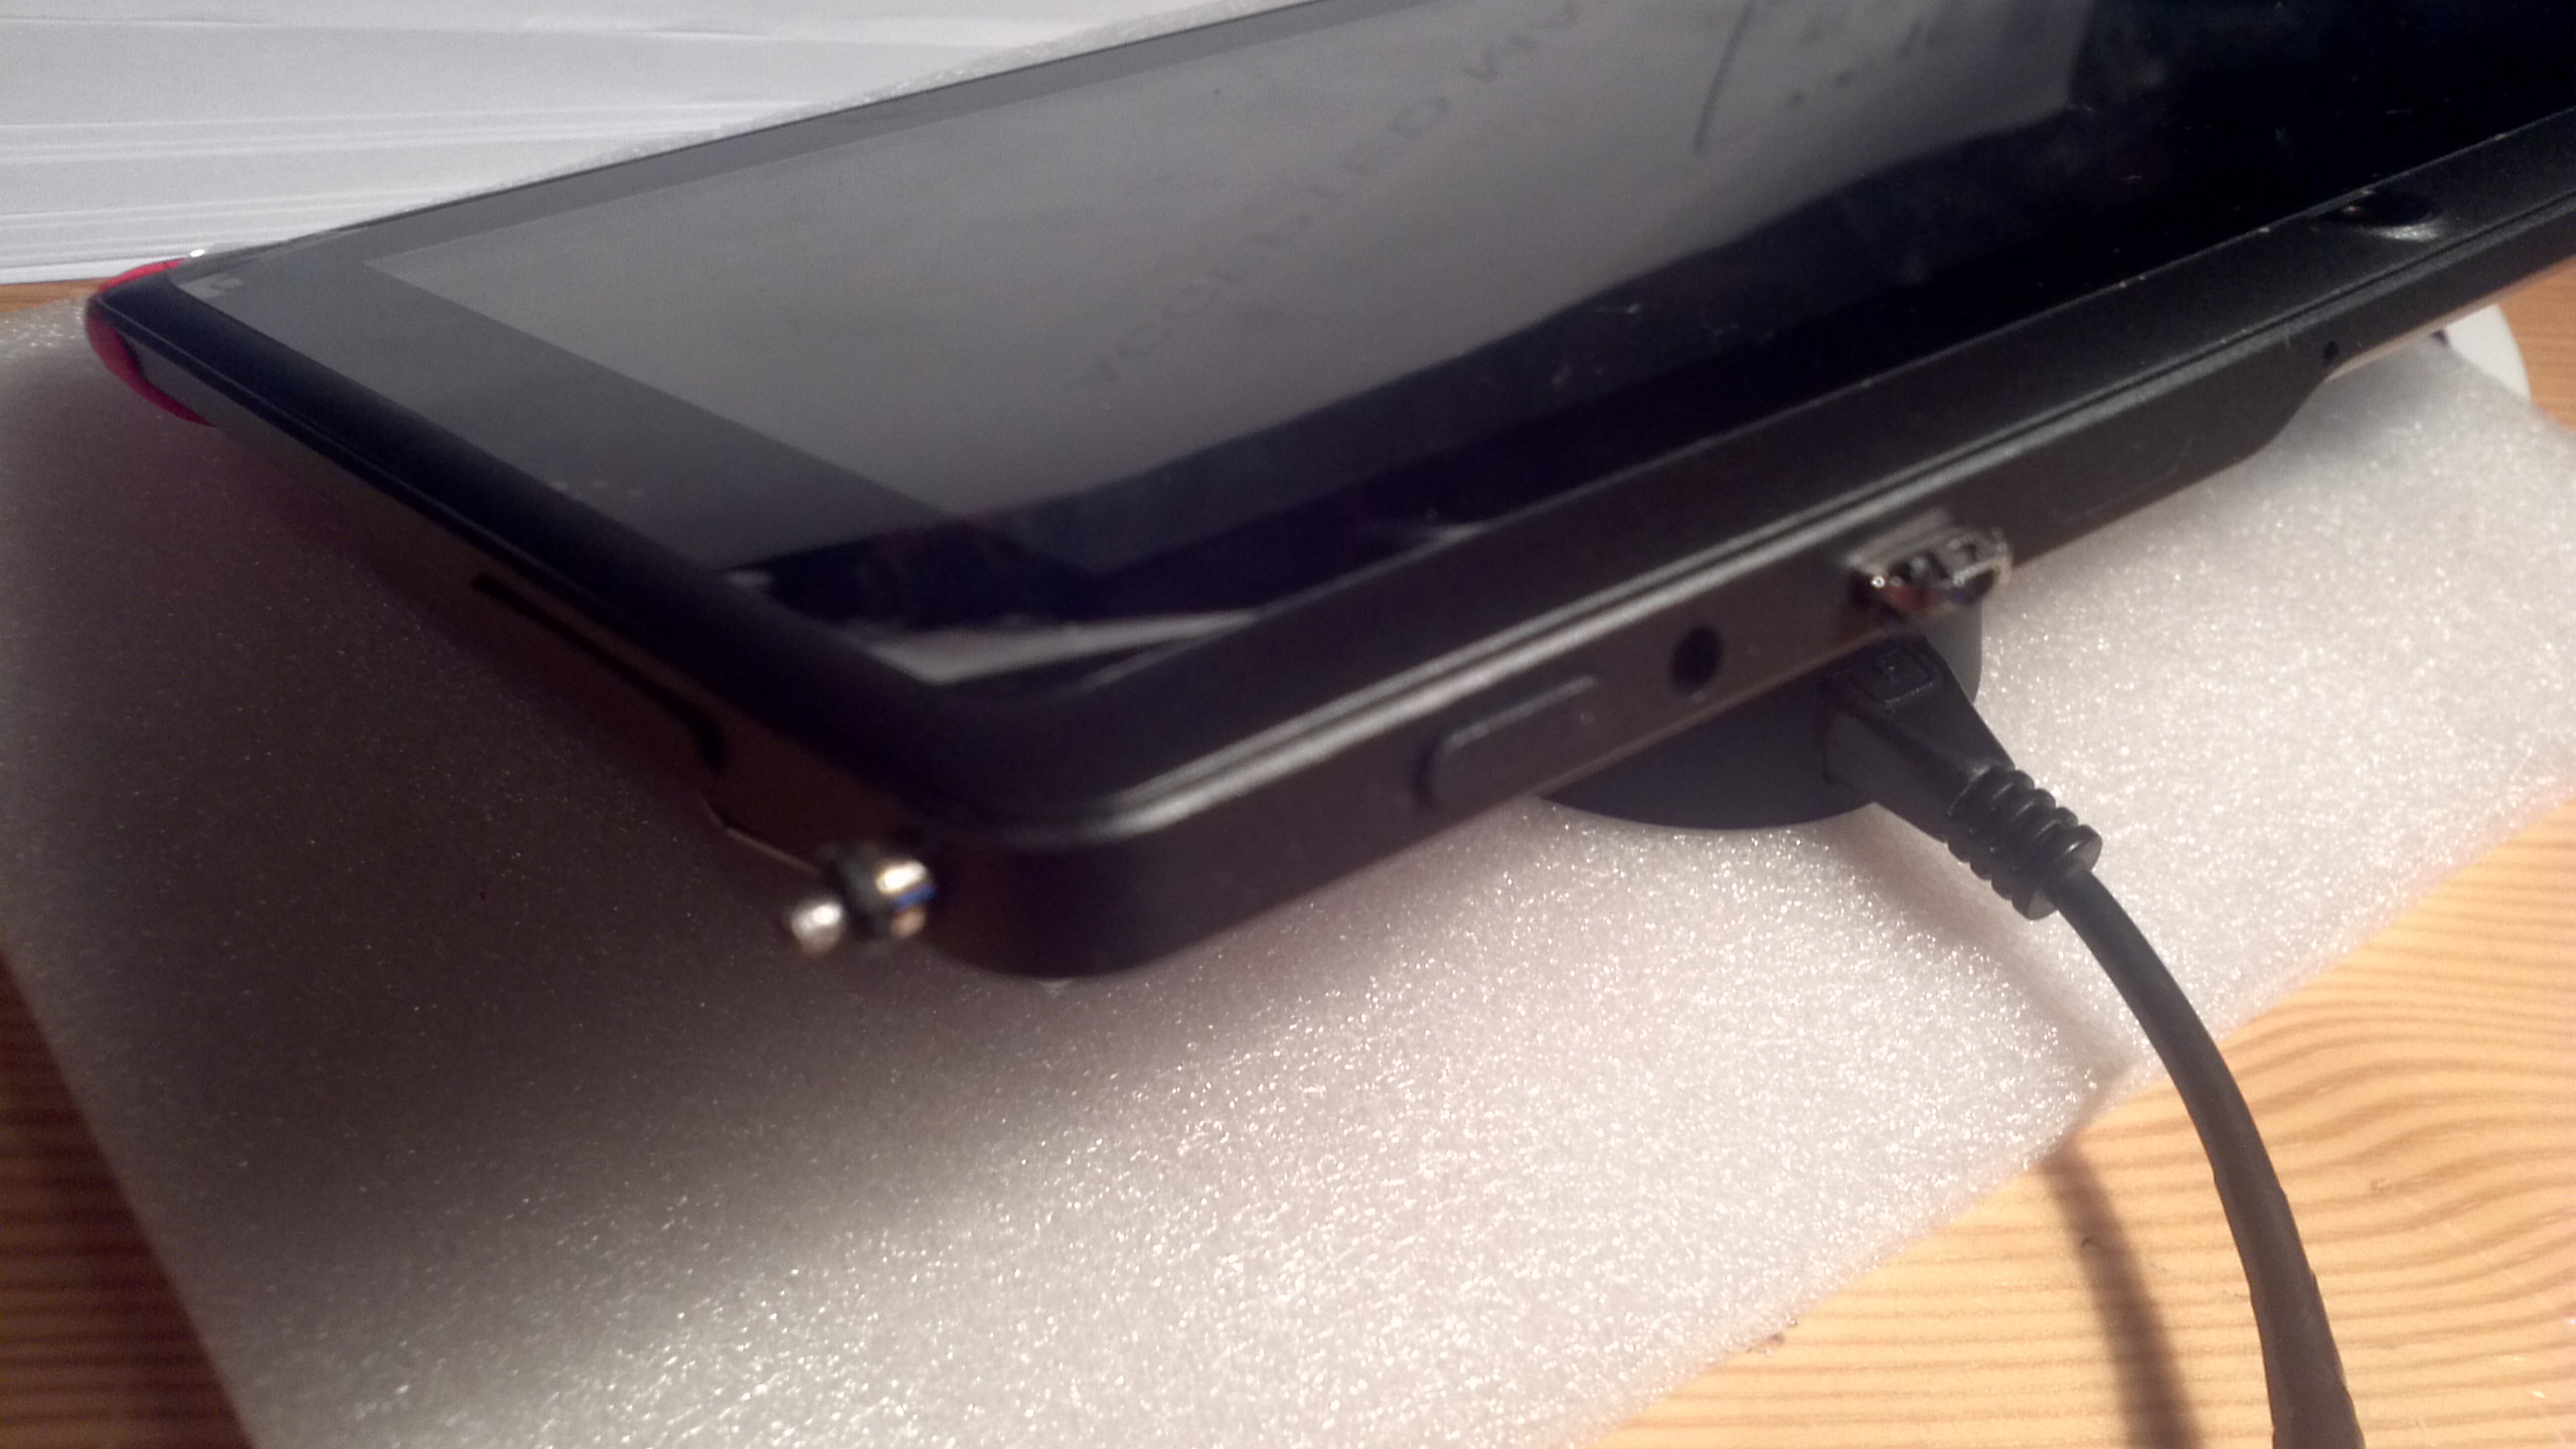
You will notice the small yellow spots of Sugru where the USB and stereo jack go. The holes left from removing the connectors after the Sugru had cured were widened slightly, then as before cling film was used to cover the hole, the connectors were pushed through and the yellow Sugru was applied, once cured you are left with the connectors seen below.
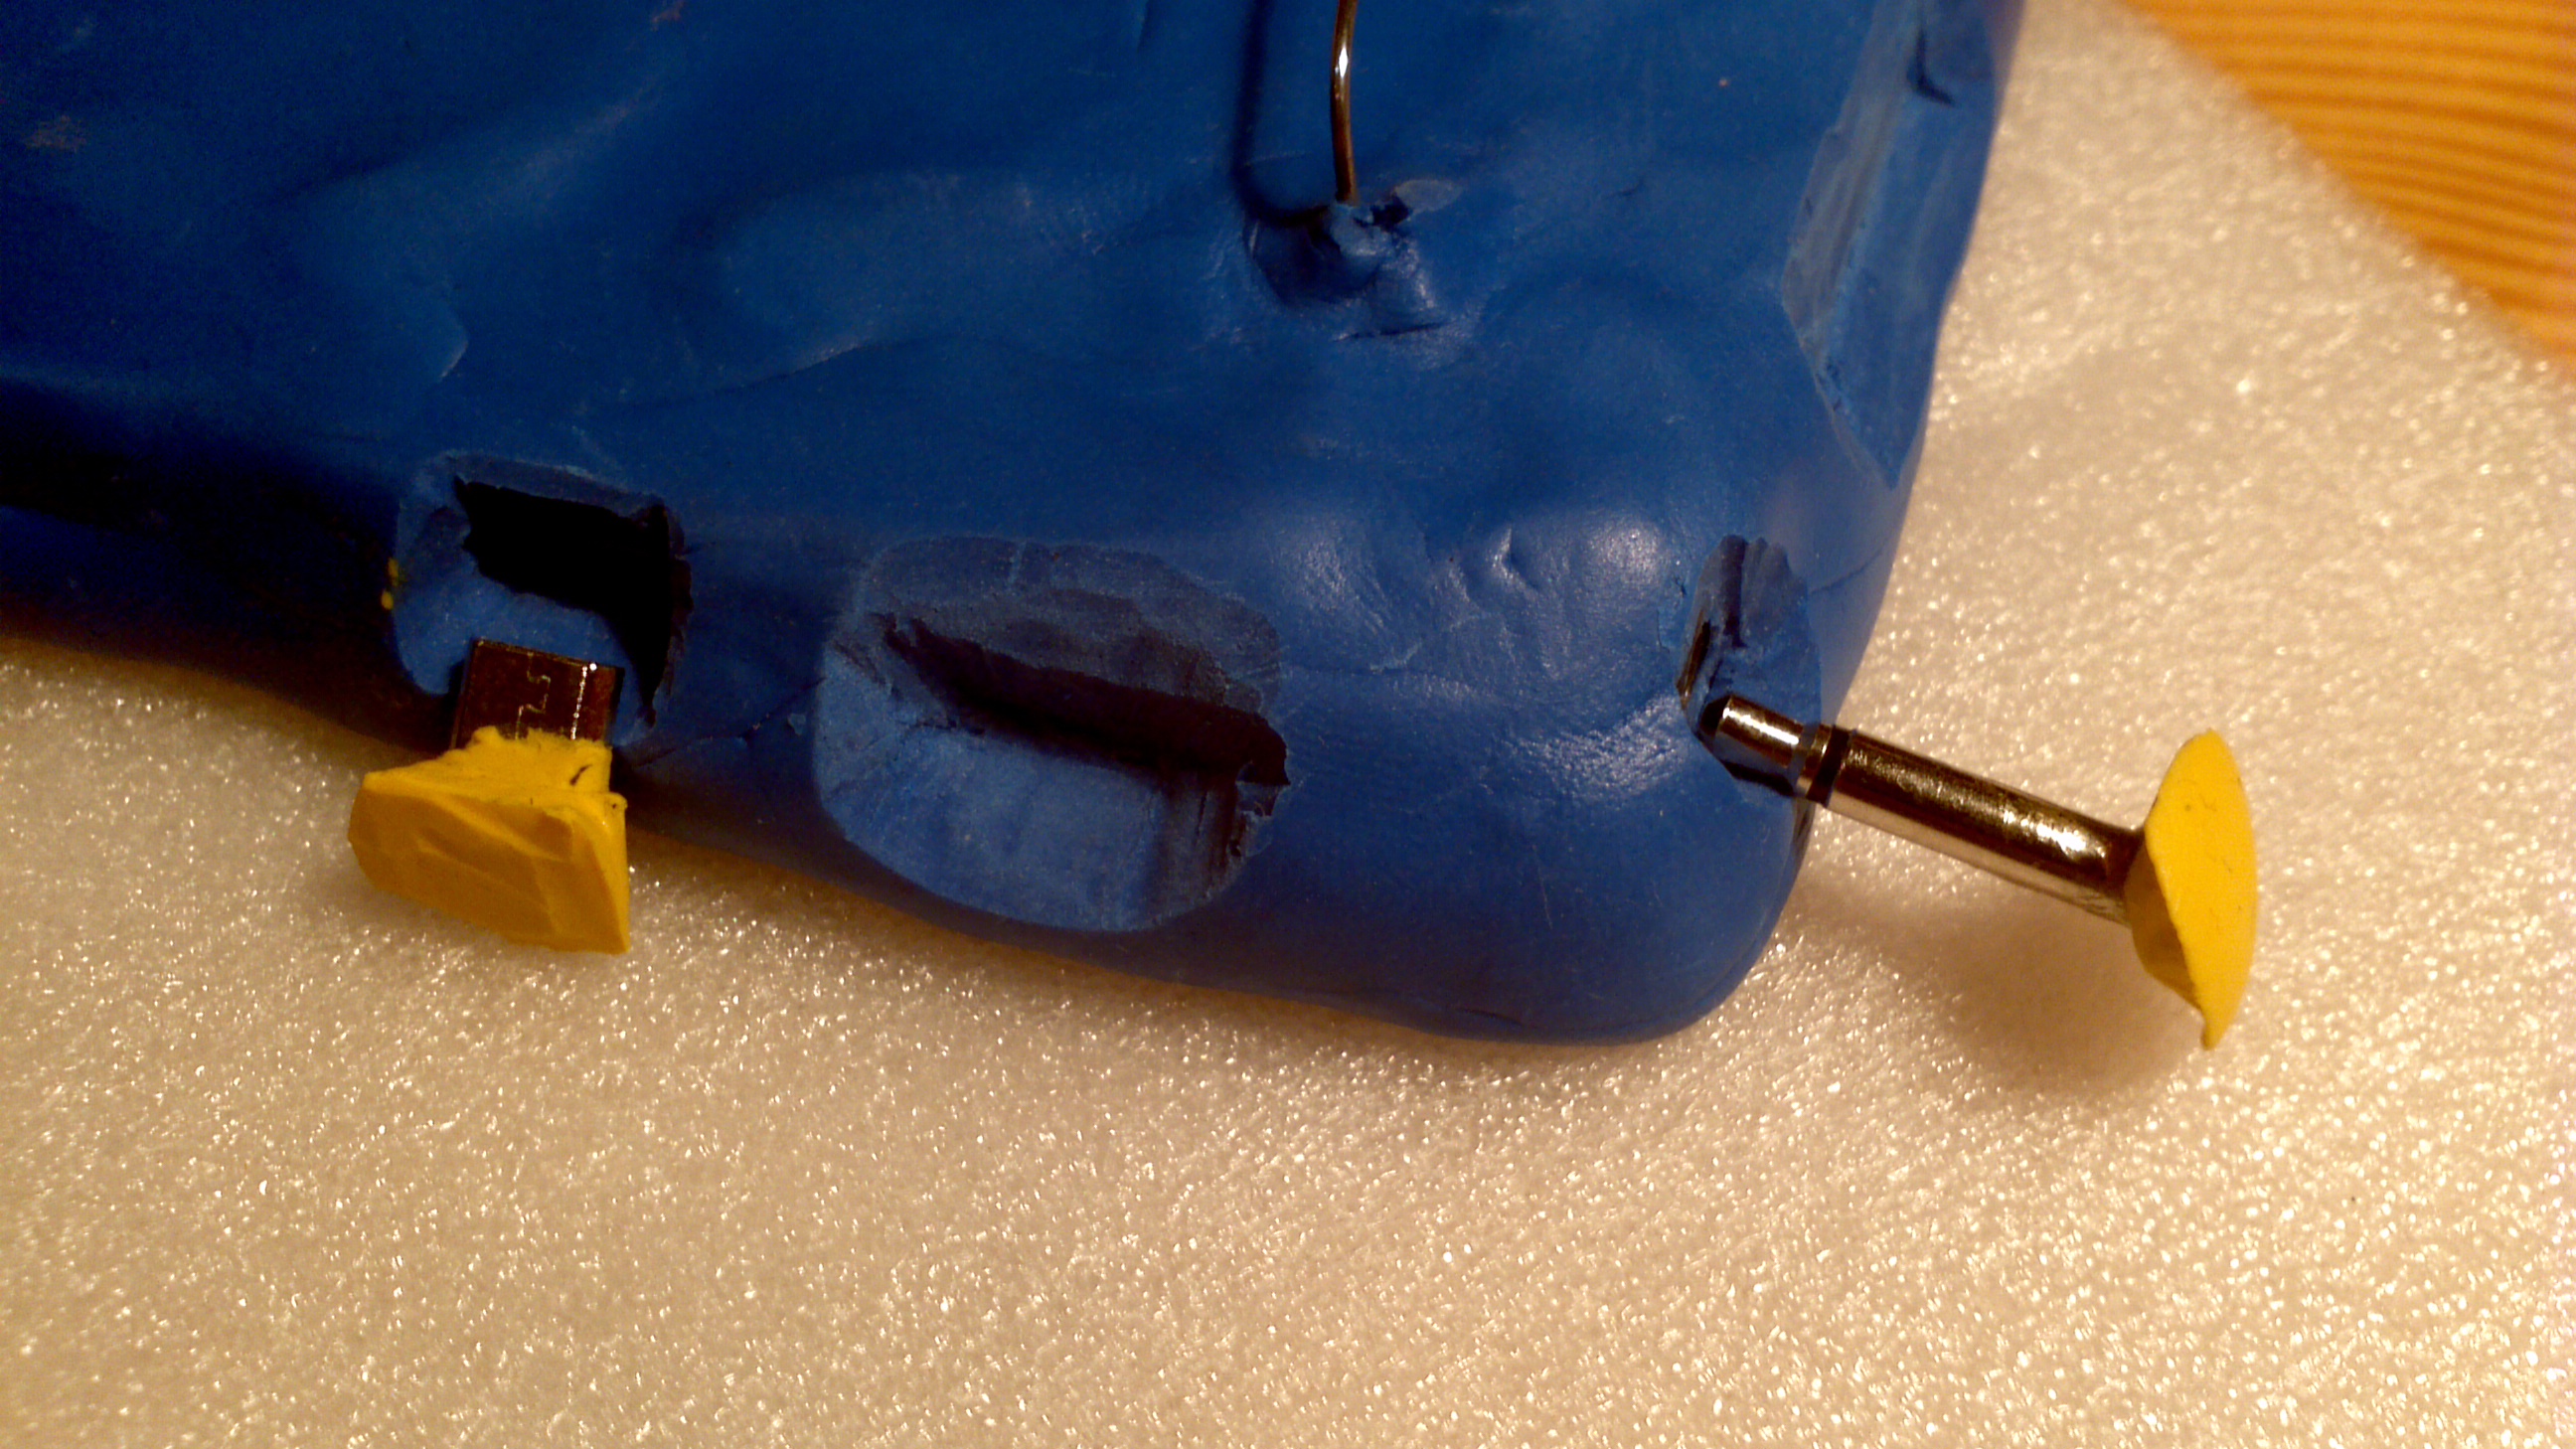
USB and Stereo Jack inserts after Sugru application
This seals those connectors when in use. You will have to remove the stereo jack if you want to listen to sounds, so I made a slight hole in a Sugru “foot” pad where it could be kept when not in use, see below.
Stereo jack holder
I think if I was to do this again I might use a2small pieces of fishing line attached to the paper-clip loop before the Sugru was applied and attached these to the 2 connectors. This would stop them from getting lost, but the issue with this approach is that it makes it easier for the toddler to pull them out themselves. If you could somehow seal the fishing line under the Sugru it would be ideal.
Now all that is left to do is customise the tablet for your toddler, load up games and educational apps (the android market has plenty of free apps), and enjoy!
Happy hacking!
Disclaimer
We’ve thought very carefully about the advice given above. And while we can state, categorically, that all effort has been made to ensure that it is reasonably sound advice, we cannot guarantee that your problem will be solved. I do not warrant or make any representations as to the accuracy, usefulness or completeness of the prices, data, recommendations, advice, and any other information.I disclaim all responsibility and all liability for all expenses, losses, damages, loss of face, costs, or anything worse that you might incur as a result of the information on this page, or any linked website.Do not attempt to troubleshoot, repair, or modify any device without understanding and following all of the relevant safety guidelines! Do also please keep in mind that repairing/altering a product on your own while it is under warranty, will automatically nullify the warranty provided by the company.
Leave a Reply